How to Make a Website (Comprehensive Beginner’s Guide)
So you want a website, huh?
Creating your own website can certainly be an intimidating process, especially if you’ve never done it before. Setting up even the most straightforward site requires finding a web host, buying a domain, and choosing what technology you’ll use to build it. On top of that, you’ll need to learn how to use that technology and get everything set up before you can start publishing content.
The good news is that building your own website has never been easier — There are a lot of tools designed to help streamline many of those steps! While any web project will take hard work, you don’t need to be a developer to create an amazing website. What you will need is patience and time to get through all the necessary steps.
In this article, we’ll guide you through the entire process of making a website as a beginner and answer any questions you might have. So let’s get to it!
- Step 1: Your Website’s Purpose
- Step 2: Lock In Your Domain Name
- Step 3: Sign Up for Hosting
- Step 4: Website Builder Software
- Step 5: Plan Your Website Structure
- Step 6: Your Website’s Design
- Step 7: User Experience (UX)
- Step 8: Marketing Strategy
- Step 9: Search Engine Optimization (SEO)
- Step 10: Google Analytics
Step 1: Define Your Website’s Purpose
The first thing you need to do before committing any resources or time to a website is to decide what it’ll be about. You might be surprised how many people jump into buying domain names and purchasing hosting when they only have half an idea for a website or an online business. That’s essentially throwing money away.
If you’re thinking of launching an online business, there’s a whole other component to the planning stage. You need to analyze if there’s a market for it, consider how you’ll promote it, what your competitors are doing, and much more. However, that all falls under the ‘business planning’ category, and we’ll come back to that later.
For now, make sure you have a clearly-defined project in mind and consider what your site’s goal will be.
Some of the most straightforward examples of goals for websites are:
- Building an online brand
- Making money from ads or affiliate marketing
- Sharing your ideas on a blog
- Showcasing your portfolio to get more clients
- Selling products and services online
- Just for fun
How you approach making a website will depend heavily on your goals. Sites can change and pivot if you decide to aim for different results. Still, if you don’t have a specific plan when launching your new website, you’re unlikely to feel motivated to put in all the work it involves.
Step 2: Lock In Your Domain Name
For many people, this is the point where making a website turns from just an idea to a real project. Buying a domain requires committing some of your hard-earned money. That means if you decide to abandon the site, that money is lost.
The good news is that most domain names aren’t that expensive. A standard .com domain will cost around $10-15 per year. That’s a fantastic value, and if you wait for the right sales, you can often register a domain for even less money.
There are a lot of Top-Level Domain (TLD) options beyond .com. However, if you’re working on your first website, we recommend sticking to the tried-and-true one. .com domains tend to be regarded as more professional and are the standard for most websites.
What is a gTLD?
Generic Top-Level Domain (gTLD) is the standard Top-Level Domains (TLD). “.com” is the most popular gTLD, but “.org”, “.net”, and other similar extensions fall under this same classification.
Read MoreFrom a technical perspective, there’s no difference between a .com domain and a .coffee one. However, novelty TLDs can confuse some users and affect how your website is perceived.
The registration process is simple. Pick a domain name, see if it’s available, and if it is, buy it. You’ll need to fill out some personal information and decide if you want to pay for any add-ons, such as WHOIS protection (which is sometimes free, depending on the registrar):
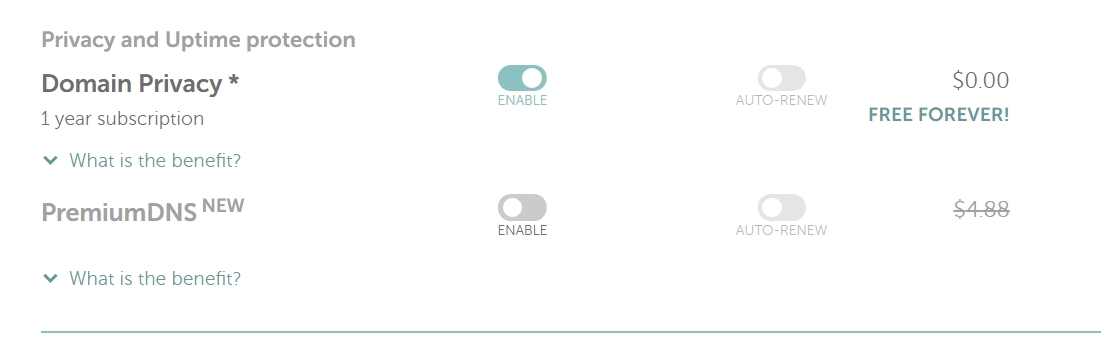
WHOIS protection tends to be cheap, and it prevents random people from looking up your contact information through public domain records. We recommend getting it to minimize spam emails.
Step 3: Sign Up for Hosting
We could write an entire book about hosting (and we have a lot of articles on the subject). There are hundreds of web hosting providers to choose from, and here’s what you need to keep in mind when selecting one:
- Not all hosting services offer the same level of quality.
- Some web hosts are optimized for specific types of websites (such as e-commerce or WordPress sites).
- Free hosting options will almost always offer a lower level of service.
- A lot of hosting providers advertise prices that drastically increase when you need to renew your contract.
- You should look at lots of reviews before signing up for a web host.
Ideally, you’ll be using the same web host throughout the entire lifecycle of your project. That means you must be certain they offer excellent service before signing on the dotted line.
When working on your new website, it can feel tempting to opt for the cheapest web hosting service or pay for something more expensive than you need. For your first site, we recommend either shared or managed hosting:
Shared hosting is cheaper but may require more hands-on optimization to boost your site’s performance. With managed hosting, you pay more, but you don’t have to worry about site optimization, backups, and security (depending on the web host).
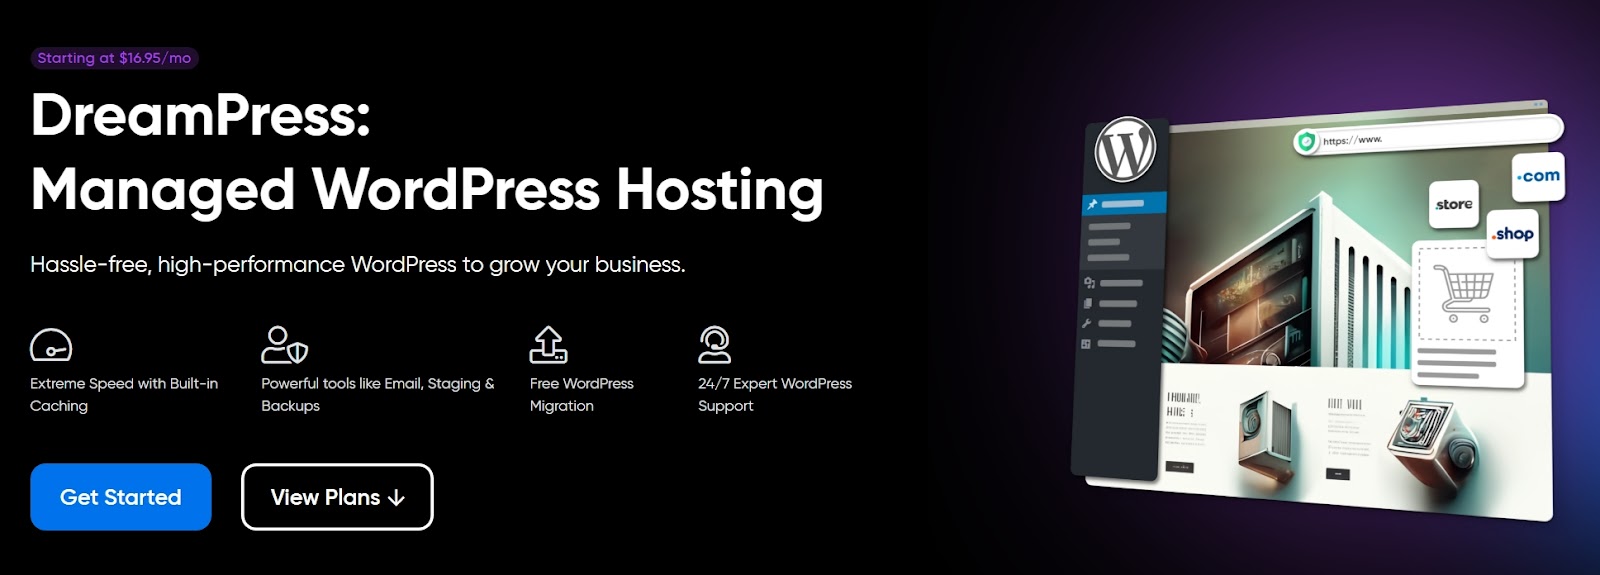
If you plan on using specific software or a Content Management System (CMS) such as WordPress, it might be a good idea to choose a hosting provider with plans optimized for it. Our DreamPress plans, for example, come with WordPress pre-installed and offer managed services.
What is WordPress?
WordPress is an open-source Content Management System (CMS). Since it is free and accessible, WordPress is used to power almost any type of website, from blogs to e-commerce businesses.
Read MoreAfter you sign up for hosting, you’ll need to point your domain toward your new servers. This doesn’t happen automatically, and if you’re uncomfortable changing your domain’s configuration, you can ask your registrar’s support team to help you do it.
Step 4: Choose Software to Build Your Website
When you think about building a website, you might imagine someone coding each web page by hand using HTML, CSS, PHP, JavaScript, and other programming languages. That’s a valid approach, but it only works if you’re either an experienced web developer or have a lot of free time to learn how to code.
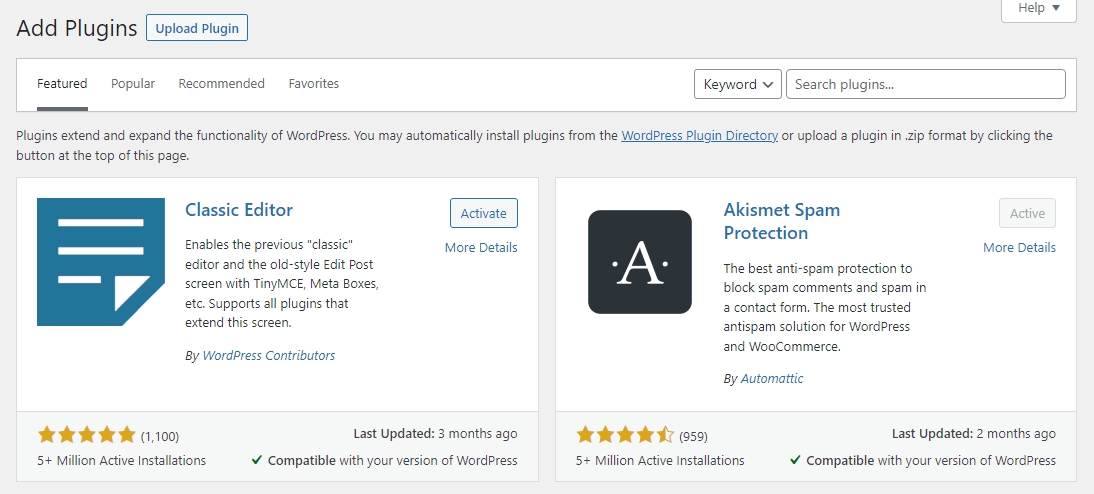
These days, most websites are built using software such as WordPress. CMSs like WordPress provide the tech “back end” for almost any website. You can create pages with a few clicks, customize them using built-in editors, change design styles by installing themes or templates, and even add new functionality with WordPress plugins:
A staggering 43.2% of all existing websites use WordPress, and with good reason. If you’re working on your first website, WordPress will provide a solid foundation to grow your site into a popular user destination.
If you know your way around other CMS or software options, by all means, go for it! You’re the only person that knows exactly what features you need, so trust your judgment.
If you decide to use WordPress, you’ll need to install the CMS on the server you’re renting from your web host. A lot of hosts provide access to a control panel where you can use automatic installers for popular software:
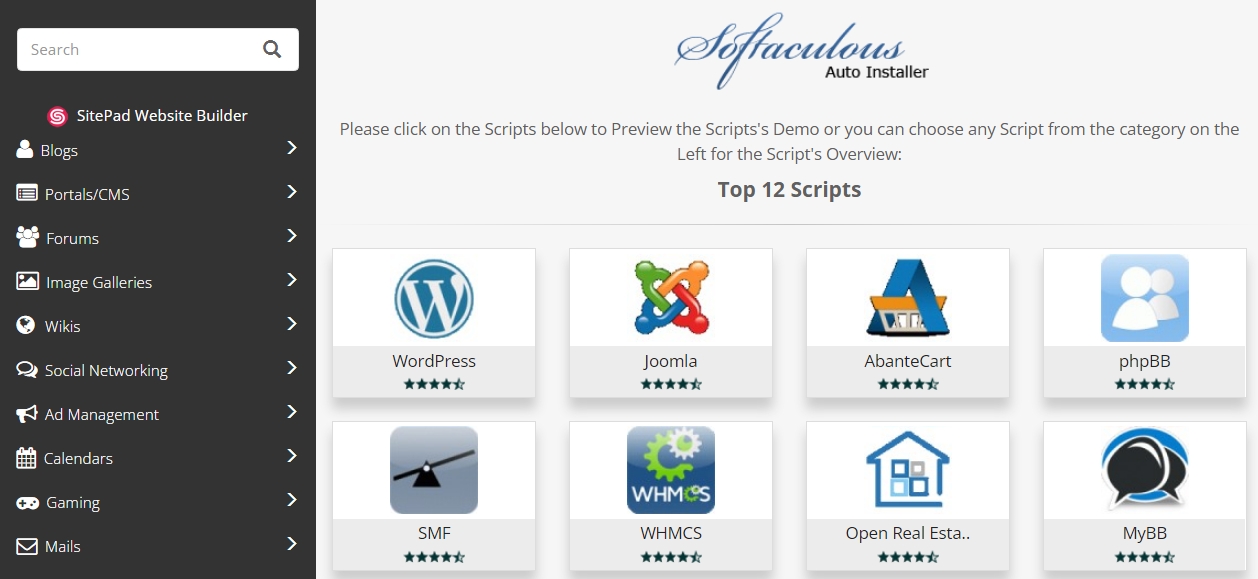
Some providers will even pre-install WordPress for you when you sign up. However, that’s usually only the case if you sign up for a WordPress-specific or managed hosting plan (such as DreamPress).
After WordPress is up and running, take some time to familiarize yourself with how the CMS works. Explore every tab in the dashboard, try different themes and plugins, and build a few practice pages:
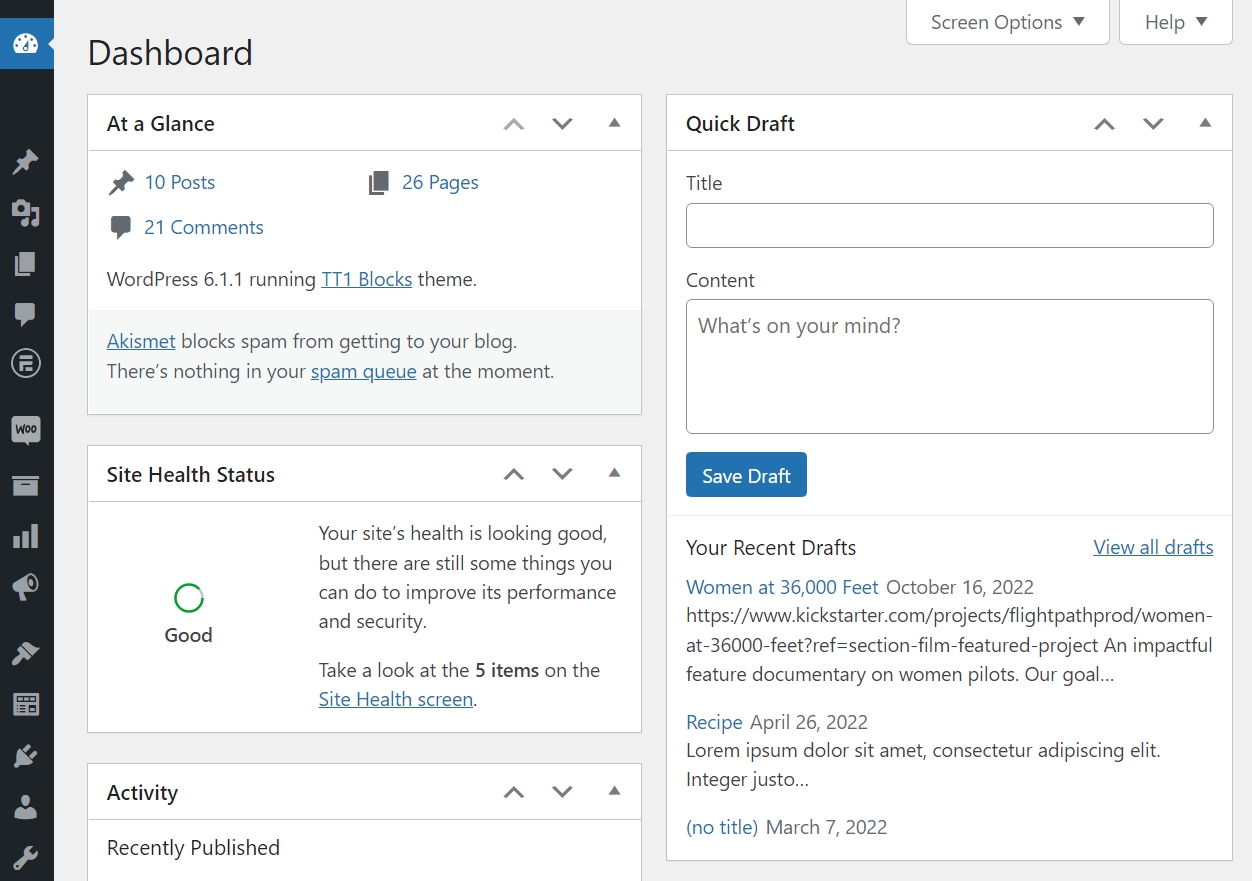
From this point on, you will begin actual work on website design and development. Being familiar with the interface will save you a lot of time during this process.
Step 5: Plan Your Website’s Structure
You already know what kind of website you’re going to build. You also have a domain, hosting, and the tech back-end to make the site. Now, it’s time to work on planning the site’s structure.
By structure, we mean deciding which pages the site will include. You should also outline the key elements for each web page.
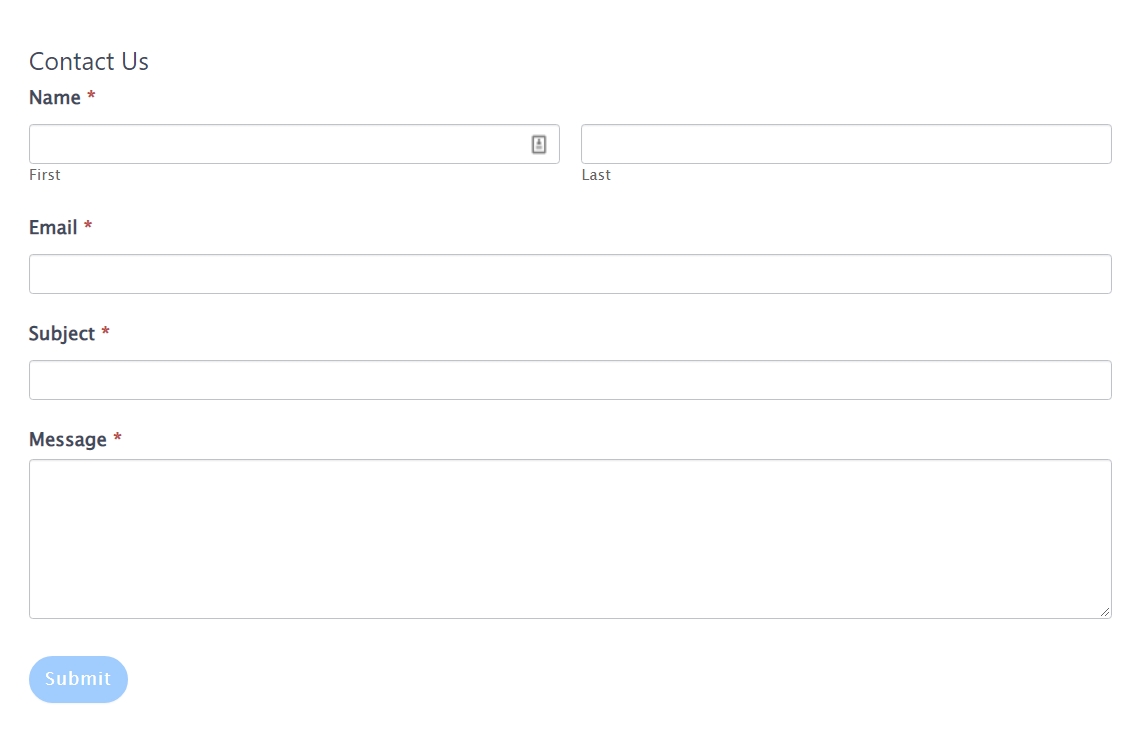
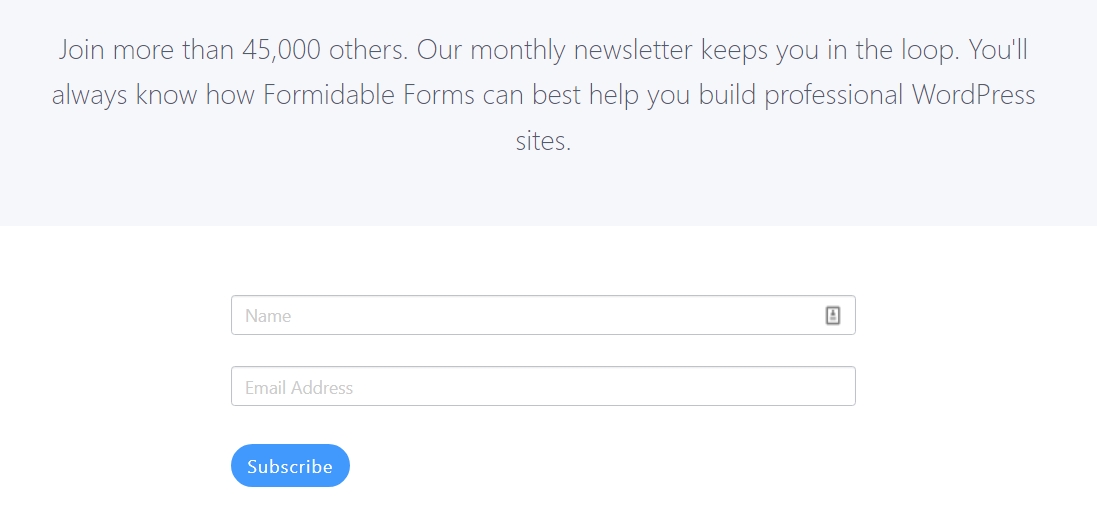
For example, if you want to add a Contact Us page, it should include a contact form:
At this stage, this can be a very rough layout. In fact, we recommend against spending too much time planning exactly what your website’s design will look like. That’s a different step, and your site’s design will likely change drastically while you’re actively working on it (we know this from experience).
If you’re not sure which pages your website should include, here’s a basic list of options that most sites can benefit from:
- Homepage. Every website has a homepage. This is the heart of your site, so you must carefully consider which elements you will include.
- About Us. This page can tell visitors more about you and your team. You can include short bios and discuss what your website’s goal is.
- Contact Us. Users will want to get in touch with you at some point. A Contact Us page makes it easy for them to do so via email or an embedded contact form.
- Blog. The Blog page should include your latest blog posts and enable visitors to browse the archives.
- Shop. If you want to sell products online, you need a Shop page. This is where visitors can start looking for the products they want to buy and navigate the store’s catalog.
- Frequently Asked Questions. Depending on your site, you should include a page that answers common questions users might have about your content, services, or products.
Since this is your first website, we recommend looking at similar sites targeted toward the same audience you want to focus on. For example, if you’re going to launch a cooking blog, check out other food sites to see how they’re structured. In other words, scope out the competition.
This should give you an idea of which pages and elements you should include. Write all this information down in a list and save some of the pages you like the most as inspiration. You’ll want to refer to them during the design process.
Get Content Delivered Straight to Your Inbox
Subscribe to our blog and receive great content just like this delivered straight to your inbox.
Step 6: Begin Working on Your Website’s Design
Once you know what pages you want to include on your website and the elements they’re going to have, it’s time to get to work. By work, we mean creating, designing, and tweaking the pages you envisioned until you’re happy with the results.
This is where you’ll face the biggest challenge if you don’t have a web development or design background. It’s fairly easy to put together some simple pages with HTML and CSS. Still, modern websites include many advanced features you can’t easily cobble together just by going over a few quick tutorials.
If you don’t feel confident creating and designing each page from scratch, you have two options: hire a professional, or use a CMS.
Option #1: Hire a Professional Web Developer
While it’s true that it’s never been easier to build a website, not everyone has the time to create page after page from scratch. That is even assuming you have the necessary skills to do so and don’t need to spend time learning.
For a lot of people, hiring a professional web developer is their best bet. If you’re working on a website for your small business, an online store, or anything that needs to look as professional as possible, paying for a developer can be a significant investment.
A professional web developer can take your plans and bring them to life. They’ll know what is and isn’t possible. Plus, they’ll likely finish the project much faster than you could on your own.
To be fair, professional web developers don’t come cheap. On average, freelance web developers in the US charge between $35-150 per hour. That means a simple website that takes about ten hours to set up can cost around $2,000, at the low end of the spectrum.
If you decide to go this route, you must set up your hosting and domain before contacting a developer. You’ll also want a detailed outline of which pages you want, design guidance, examples of websites you like, and any other relevant information you can think of.
All of that prep work means the developer can start working on the pages faster, and you won’t pay exorbitant fees for things you could have done yourself. This process will likely take longer than you think, cost more, and involve revisions, so you need to go into it prepared.
Option #2: Use a CMS that Supports Themes
Most modern CMSs offer support for templates. Themes or templates are pre-built designs for specific types of pages you can use to get your website up and running faster.
Content Management System (CMS)
A Content Management System (CMS) is a software or application that provides a user-friendly interface for you to design, create, manage, and publish content.
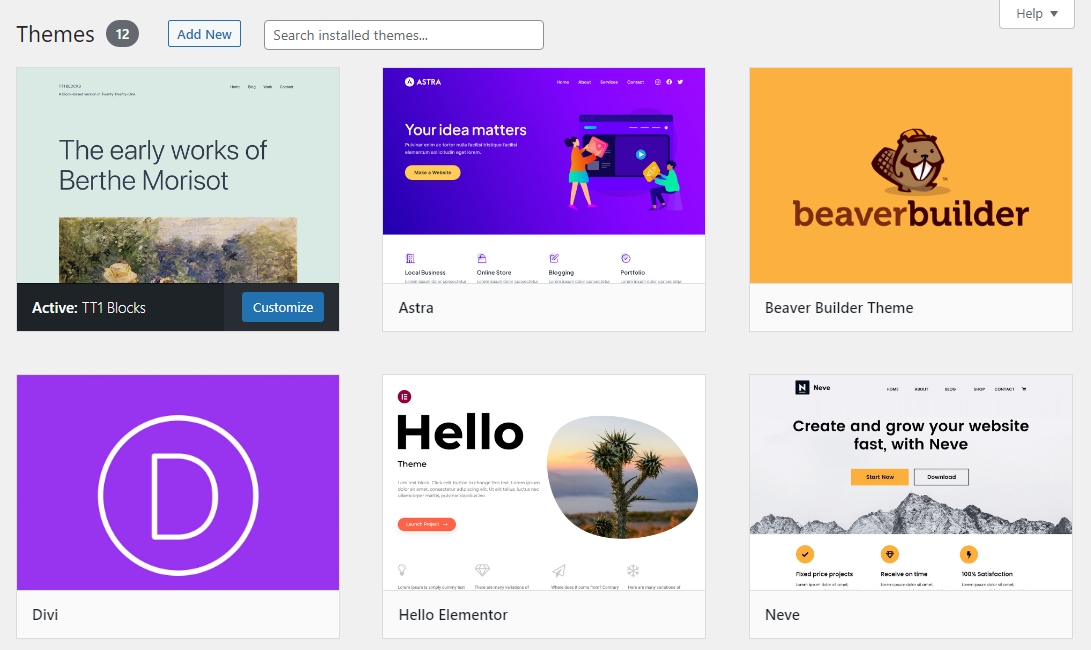
Read MoreTo get an idea of what a theme can look like, you can check out the WordPress theme repository:
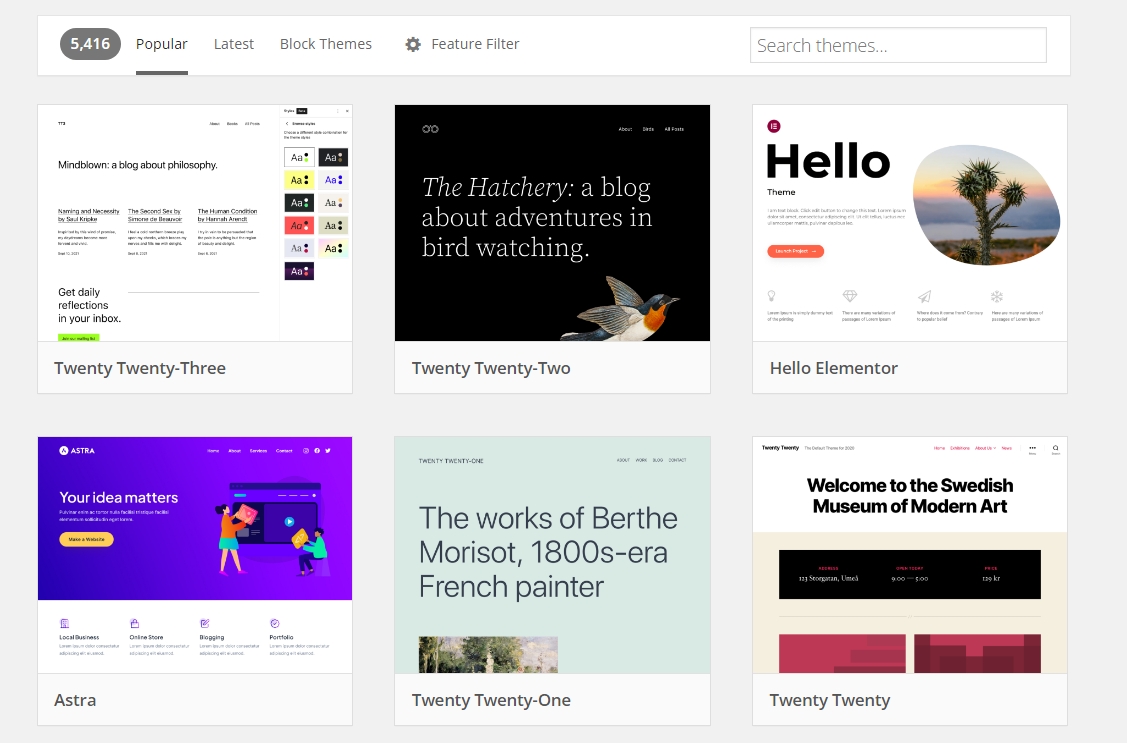
All of those themes are free options. You can download and install one on your website in minutes. With WordPress, you can install multiple themes and switch between them with a few clicks to test different website designs:
Themes are not ready-to-go website designs. After setting up a theme, you’ll still need to customize it, set up the pages you need, add your content, and make sure you’re not missing any key elements. There’s still a lot of work involved, but you can skip the code-heavy phase of creating and styling pages from scratch.
Besides themes, CMSs such as WordPress often enable you to use visual editors or website builders. These are drag-and-drop interfaces with pre-built “blocks” or elements you can place, move around, and customize within your pages:
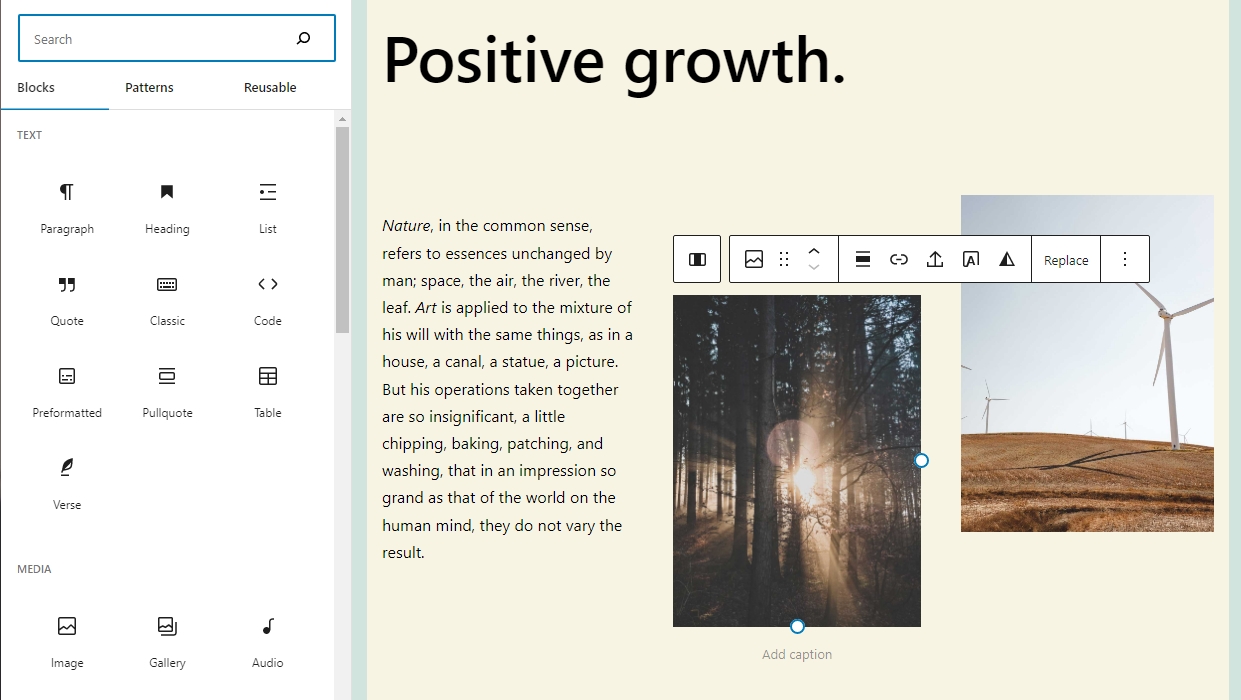
The result is that you can build fully-functional websites without a background in web development. You’ll still need time to learn tools like the WordPress Block Editor, but the process is much easier than learning web development from scratch.
Step 7: Mind Your User Experience (UX)
By this point, you should have a nearly completed website. Pages will be functional, and the website’s initial content should be in place. That means all the pages will have their written and visual content, and a user should be able to move from one page to another and complete actions seamlessly.
We use the word “should” because many people don’t test their websites before making them public. With that in mind, this step is simple. Go ahead and ask some friends or colleagues to take your website for a test run.
To collect more valuable information from their experiences, ask the following questions:
- Is the website easy to navigate?
- Did you spot any elements or pages that don’t work?
- Do you think the website is missing any key functions?
- Is there any aspect of using the site that you didn’t enjoy?
Keep in mind that not all feedback you get will be actionable. If you can get feedback from professional designers or web developers, they’re more likely to spot glaring errors in the site’s usability. They’ll tell you if the text is hard to read, buttons aren’t noticeable, forms don’t work, Calls-to-Action (CTA) need some changes, and much more.
You can get all of this user experience feedback after launching your site and receiving visitors. However, enticing the first users to your website takes a massive amount of work. If you want those users to come back, you need to make sure your website looks like a professional project rather than something put together haphazardly.
Step 8: Plan Your Marketing Strategy
Websites don’t just get visitors out of nowhere. If you want people to find your website, you need to market it.
There are a lot of ways to market a website. However, these are the main approaches to focus on:
- Content marketing. This approach involves creating content that users can find via search engines or social media. If you want to focus on content marketing, you’ll need to learn about Search Engine Optimization (SEO).
- Email marketing. With this approach, you create an email list and drive visitors to sign up for it. Then, you can use email campaigns to draw subscribers back to your website and promote products and/or services.
- Social media marketing. This approach involves maintaining an active online presence on social media and driving your followers to your website.
- Paid advertising. This approach is the most effective way to get clicks and visits if you have the budget to pay for ads on search engines, social media, and other websites. However, it requires a sizable budget, and you still need engaging content and offers for those visitors to stick around.
Ideally, you’ll use a mix of the first three marketing methods. The fourth option, paid advertising, is optional. We only recommend it for e-commerce sites, if you’re selling services, or if your website is already monetized. That way, you’ll be able to offset the costs of paying for ads without losing money.
Most websites can benefit from an email list and a social media presence. If you start building that mailing list from the moment you launch your website, you’ll maximize the number of subscribers that you can get:
For starters, you might send email campaigns every two weeks to give subscribers updates on new content or offers. As your website grows and you start getting more email subscribers, you can increase the frequency of the campaigns.
When it comes to social media, start by focusing on the platform where you think most of your audience is. Engage with other accounts that share similar interests, post about website updates, and link back to your site whenever it makes sense.
Both email and social media marketing will take some time to get off the ground as you gather subscribers and followers. Don’t be discouraged if your content takes some time to get interactions, as the effort will be well worth it.
Step 9: Learn the Basics of SEO
SEO is perhaps the most powerful tool to grow your website’s traffic. If you can learn how to optimize for search engines and publish information that people are actually looking for, you will get traffic.
What is SEO?
Search Engine Optimization (SEO) is the practice of improving a site’s ranking in search results. Search results are aggregated based on a number of factors, including a site’s relevance and quality. Optimizing your site for these factors can help boost your rankings.
Read MoreThere is a lot to unpack when it comes to SEO. Here are some of the main things you’ll need to consider when it comes to “on-page” optimization:
- Research which keywords to use. “Keywords” are the terms people use to look up information on search engines. A great SEO strategy involves researching what people are looking for and building content around those queries.
- Use descriptive page titles and subheadings. Search engines don’t really “understand” what information pages include. Instead, they use contextual data to help determine when to show results, and titles play a huge role. Use descriptive titles that tell users exactly what information each section covers.
- Add meta descriptions to each page. Meta descriptions are short blurbs of information that appear below titles in Search Engine Results Pages (SERPs). A good meta description can increase clickthrough rates for any given page.
- Using internal links. Linking to other pages within your website helps increase on-page time and shows you have relevant information for users to peruse.
- Getting other websites to link to you. This is one of the most important aspects of SEO. Search engines take backlinks as signs of trustworthiness, so you must get other websites to link to your pages.
That’s just the tip of the iceberg when it comes to SEO. There’s much more to learn about in this field, including structured data, local SEO, voice search optimization, etc.
For now, focus on the basic best practices of SEO and read as much about the subject as possible. SEO can take months or even years to pay off, but it’s a surefire way to get steady traffic to your website.
Step 10: Sign Up for an Analytics Service
Many web hosts provide you with data about your website’s traffic. However, if you want more in-depth information than “You got 100 visits!”, you’ll need to use an analytics service.
Analytics tools, such as Google Analytics, enable you to monitor traffic, see which sites refer users to you, determine which pages they spend time on, and access a lot more information:
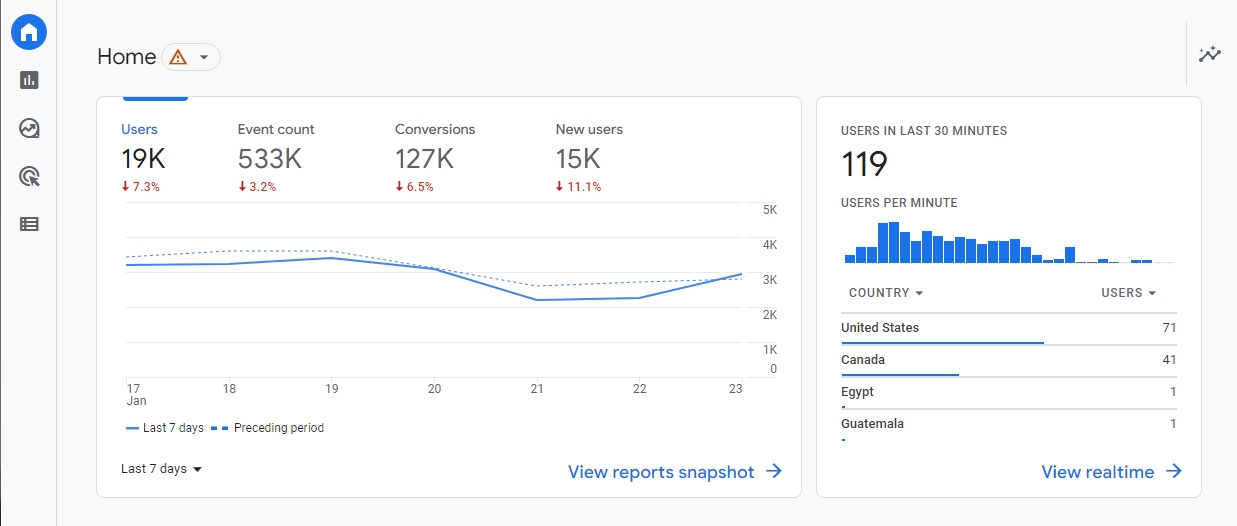
That data can help you decide how to manage your website and monitor if your marketing efforts are working. For example, if you see that you’re not getting a lot of organic traffic, it might mean you need to increase your SEO efforts.
We recommend Google Analytics because it’s a free tool and one of the most comprehensive options. It’s pretty easy to set up with most websites. Furthermore, if you collect data from the moment your site goes live, you’ll be able to monitor every aspect of its growth.
Additionally, Google Search Console is an excellent tool. It can help you monitor which keywords are bringing traffic to your site and provide suggestions for fixing performance issues.
Start Making Your Website Today
If you’ve been thinking about making a website but are hesitant, don’t be scared! It can be a long process, and some parts can be frustrating. However, it’s not an exaggeration to say making a website has never been easier. You don’t need to code to build an amazing-looking site, and most of the real work comes after the pages are published.
For a first-time project, we recommend using WordPress. It’s an incredibly versatile CMS you can use to build small and large-scale websites alike. It’s highly customizable and comes with a visual editor that makes building pages remarkably simple.
If you don’t want to do everything on your own, we have your back. At Dreamhost, we offer professional web development services where we listen to your needs and put together the perfect website for your personal project or small business. Learn more about our professional web development services!
You Dream It, We Code It
Tap into 20+ years of coding expertise when you opt for our Web Development service. Just let us know what you want for your site — we take it from there.