What Makes Up a WordPress Website? (15 Key Components)
Here at DreamHost, we love us some WordPress. Not only is it an excellent platform to use when building a website, but it’s also a powerful Content Management System (CMS). While WordPress is user-friendly, it can be slightly overwhelming to use if you’re brand new to the platform.
Each WordPress site contains a standardized set of components; these elements are what make up the basic building blocks of a WordPress site. Once you learn what each one does, using the platform becomes both easy and rewarding.
In this article, we’ll take you through the key core components of a WordPress website. We’ll demonstrate what each one does, and show you how to use them yourself. Let’s dig in!
1. The Admin Dashboard
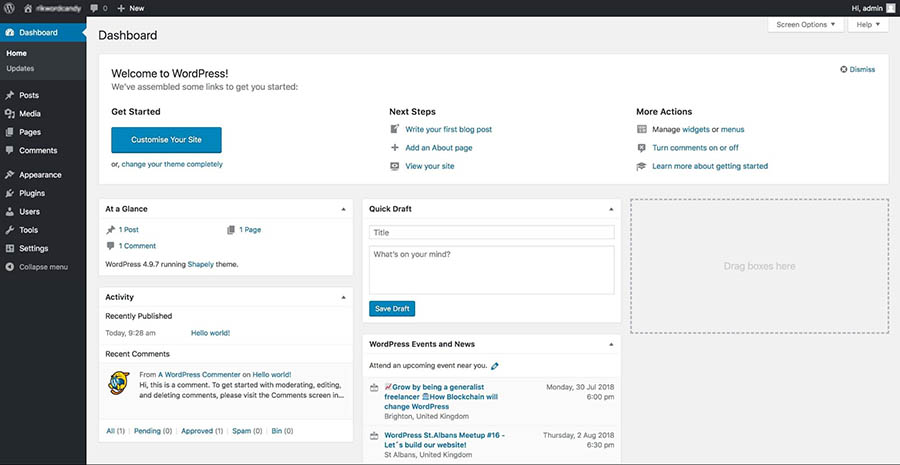
As you use WordPress, you’ll become very familiar with the admin dashboard. This is the interface you use to manage almost every aspect of your site, from creating content to changing your pages’ appearance and adding new functionality.
When you first sign in, you’ll see the Dashboard tab, which provides easy access to key areas of the admin interface. For example, you can use this to see WordPress-related news, or to quickly create a draft post.
The dashboard itself is separated into multiple pages, each devoted to a critical aspect of your site. You can navigate between them using the menu on the left-hand side. Some options also have additional sub-pages, which will appear when you hover over that item.

Many screens also feature extra options that are hidden by default. To see these, you can use the Screen Options menu in the top-right corner. Clicking on this will expand a section containing options that you can enable or disable.
Next to this, you’ll also find the Help option, which you can select to expand a section with more information about the current screen.

If you’re ever lost or unsure about what the purpose of each page is, you can refer to this section for more details. We’re also going to cover each major part of the dashboard throughout the rest of this article, so you’ll know what to expect.
Our automatic updates and strong security defenses take server management off your hands so you can focus on creating a great WordPress website.WordPress Components + DreamHost

2. Posts
Posts are a crucial component of WordPress and are used to create various types of content. They’re most commonly used for blogs, where each post represents a new update. However, posts can be used for any timely or regular content, such as news articles, image galleries, and so on.
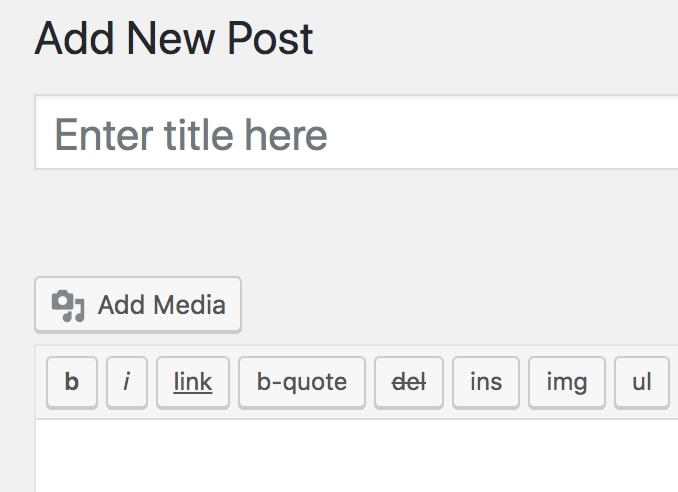
To create a post, you’ll use the WordPress editor. It currently looks like this.
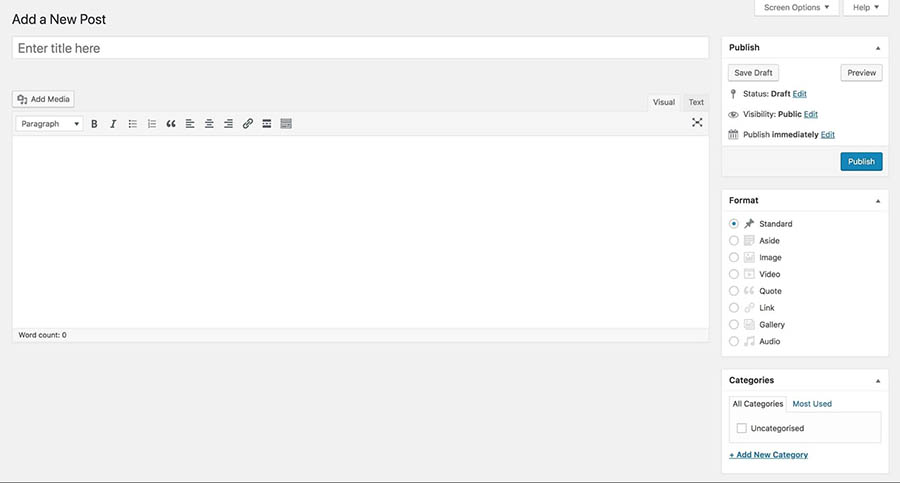
For the purposes of this article, we’ll be referring to this interface. However, it is soon going to be replaced with an updated version, called the Gutenberg editor. This will provide a radically different editing experience, so we recommend that you read up on it before the change occurs.
However, for now, we’ll stick with the classic editor. Most of the options here are self-explanatory. You can add a title and enter your content, which can include text alongside different types of media.

You can also switch between a Visual interface, which shows your post similar to how it will appear on the actual site, and a Text editor that lets you include custom code.

When you’re done editing your post, you can save it in a few different ways. If you want to post it on your site, you can click on Publish.
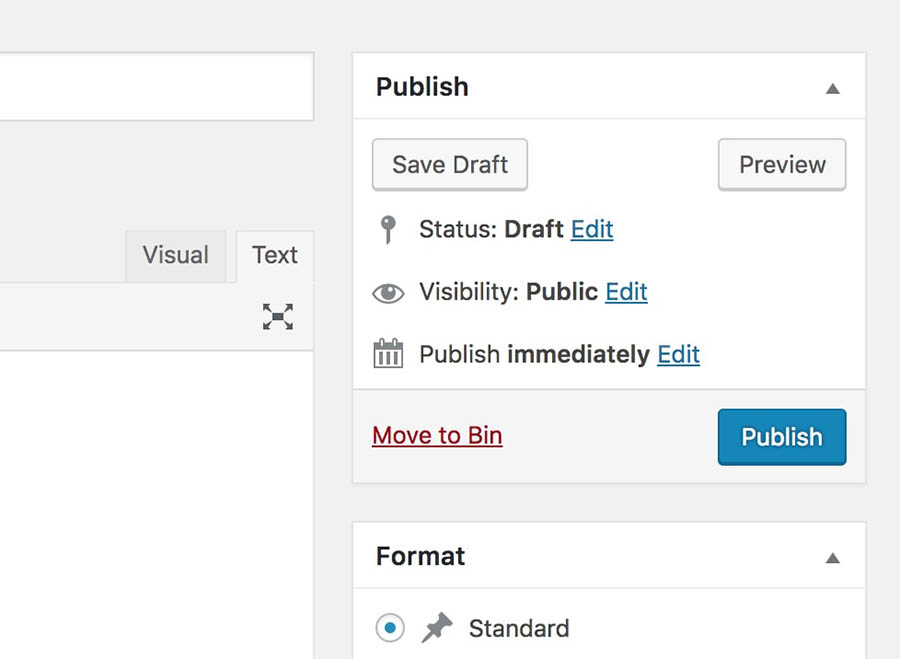
However, you can also use Save Draft instead. This will save the post but not make it public, enabling you to edit it further before it goes live.
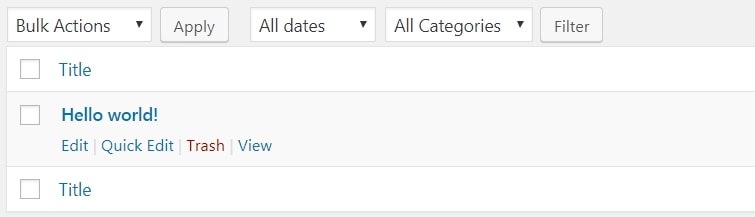
When a post is saved or published, you’ll see it listed on the All Posts screen.
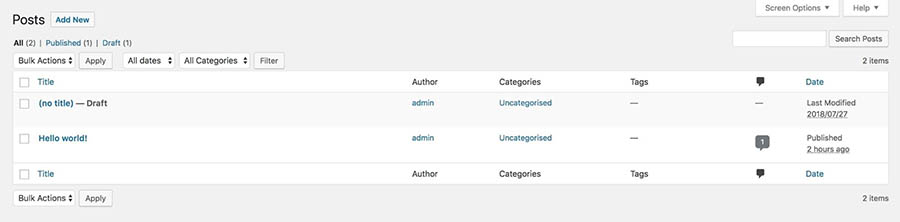
From here, you can edit posts, preview them on the front end, and even delete those you don’t want to keep.
You can also perform bulk actions for multiple posts, which is particularly helpful once you start adding dozens or even hundreds of posts.
3. Pages
In many ways, WordPress pages are very similar to posts. They’re both created and edited using the same interface (which we covered in the previous section) and can contain the exact same types of content. So what makes pages different?
The main difference is how they’re used on your site. Pages are mainly intended to hold static, more timeless content that is unlikely to change regularly. For example, if you want to post an article or a piece of news, such as The State of Women in Tech 2018, you’d use a post. In contrast, if the content contains static information about your company or one of your products, like WordPress hosting, it should be a page.
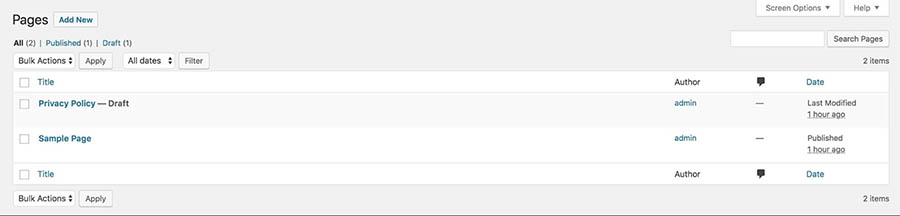
Pages are also what makes up the structure of your site. As such, you need at least one, which is usually a home page or a blog archive. However, you can add any number of pages, depending on your site’s purpose. Some common examples include an About Us page with information about your company or organization, a page containing your privacy policy, and a Contact page so visitors can communicate with you.
4. Plugins
Plugins are one of the biggest reasons WordPress is the most popular website creation platform in the world. A WordPress plugin is a piece of software you can install on your site with just a few clicks. It enables you to add extra functionality to your site, with no technical knowledge required.
The great thing about plugins is that they can be used to do almost anything. Some plugins add minor new features to your site, such as Dark Mode, which changes the colors of your admin dashboard. However, some plugins radically affect your site. Jetpack adds dozens of features, for example, including website statistics, a Content Delivery Network (CDN), and easy social media sharing.
You can see your currently-installed plugins in your dashboard, on the Plugins screen.
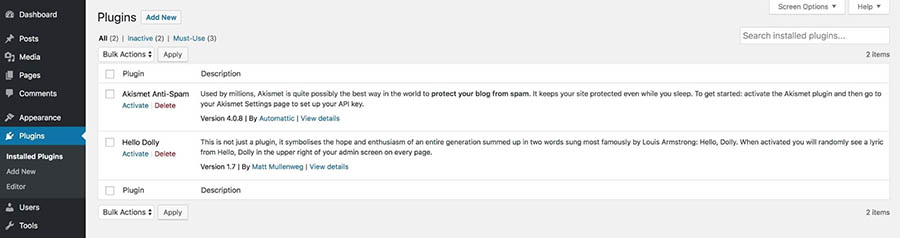
Som hosting plans come with bundled-in plugins. For example, DreamHost WordPress plans include a powerful caching solution that helps speed up your site. It also incorporates the Varnish HTTP Purge plugin, which lets you control your site’s cache manually.
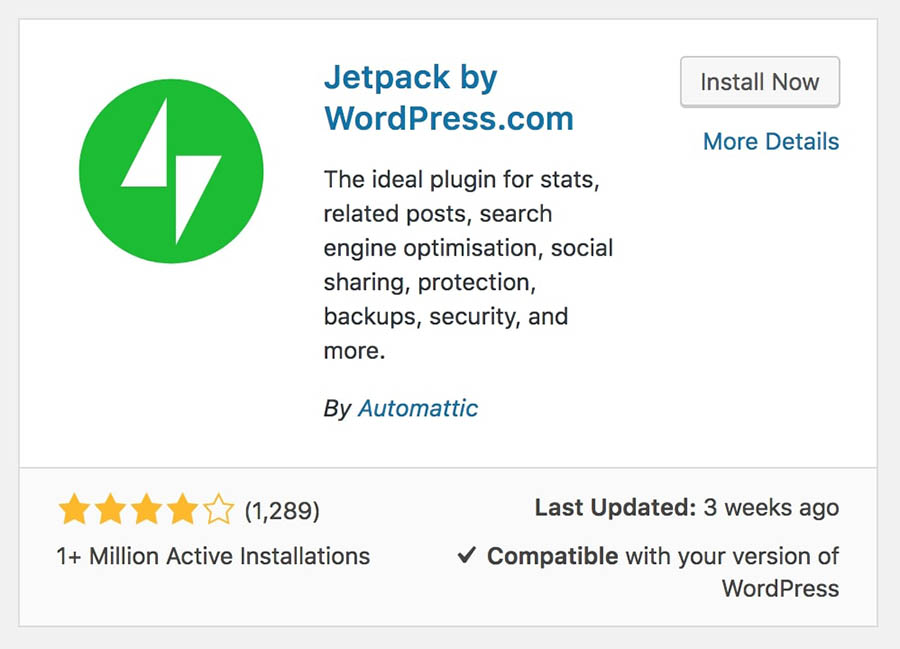
You can add free plugins to your site directly from your dashboard, by clicking on Add New. This will open the WordPress Plugin Directory, where you can browse for solutions.

To add a plugin to your site, select Install Now.
Once the plugin has been installed, the button will change to say Activate.
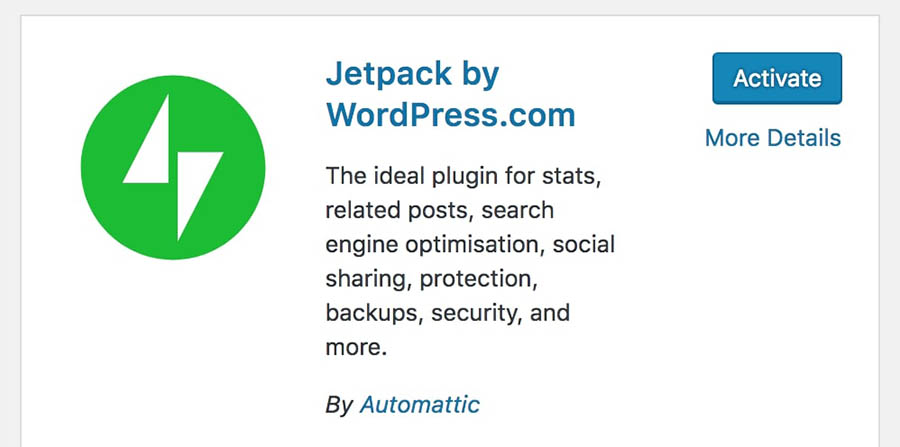
Once you activate the plugin, its functionality will be enabled on your site. Then, you can configure it or start using it right away.
5. Themes
WordPress themes are how you change the appearance of your site. You can think of them as your site’s ‘skin,’ which determines how your content is displayed on the front end. WordPress includes a set of default themes, which can be useful for beginners, but you’ll probably want something less generic.
Fortunately, there are thousands of free WordPress themes available, and you can get many of them straight from your dashboard. Start by accessing your current themes from Appearance > Themes.
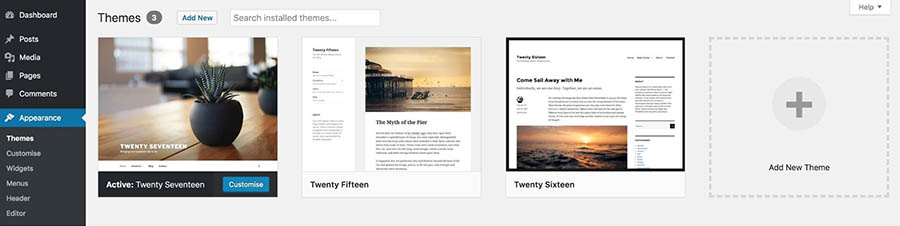
Here, you can Activate a theme to use it on your site. However, if you want more options, you can click Add New to browse the WordPress Theme Directory.
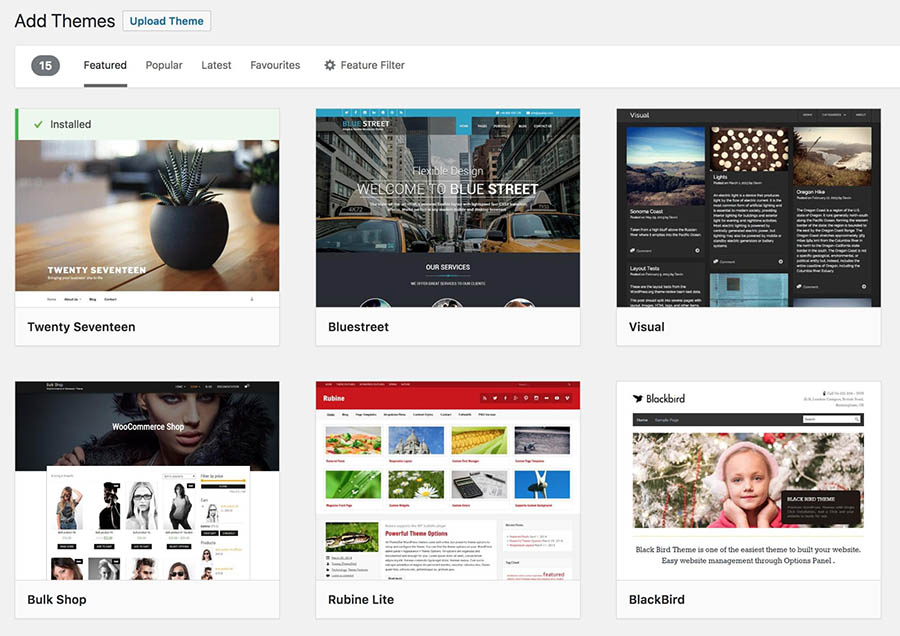
Here you’ll find plenty of free options, which you can preview to see how they’ll look on your site.
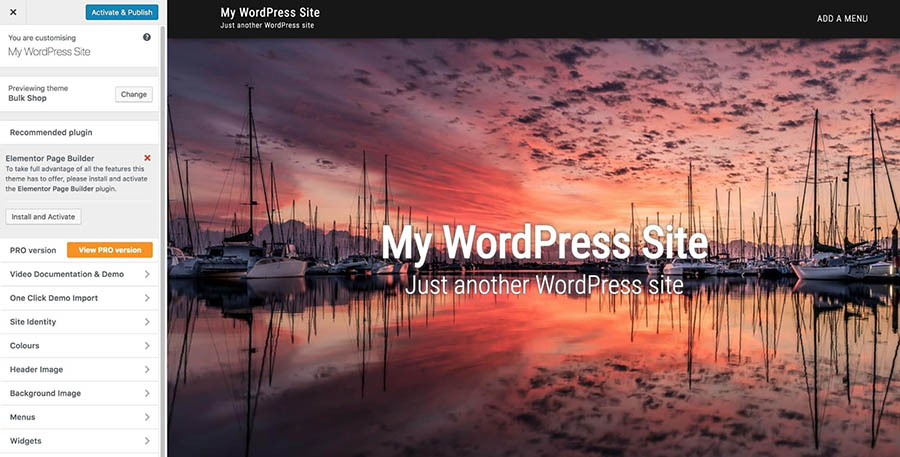
To add a theme to your site, you can install it. Once your new theme is in place, you can configure it by going to Appearance > Customize.
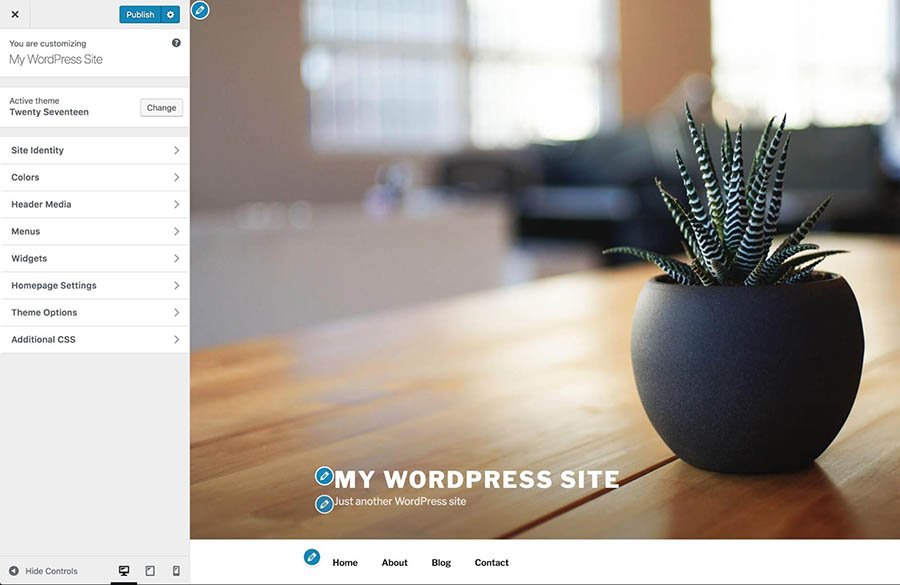
This interface lets you make changes to your theme, and see the effects it will have in real-time. Once you’re happy, just select Publish to save your changes.
6. Categories
In WordPress, a category is used to label and organize content, making it easier for visitors to navigate your site. Categories can be broad or more specific. For example, you could have a category for News posts, which could then have sub-categories for Company News, Industry News, and Event News.
Each category you create will automatically generate a page, which will display all posts assigned to that category. As such, if you assign the Event News category to a post, its content will appear on https://yoursite.com/category/event-news.
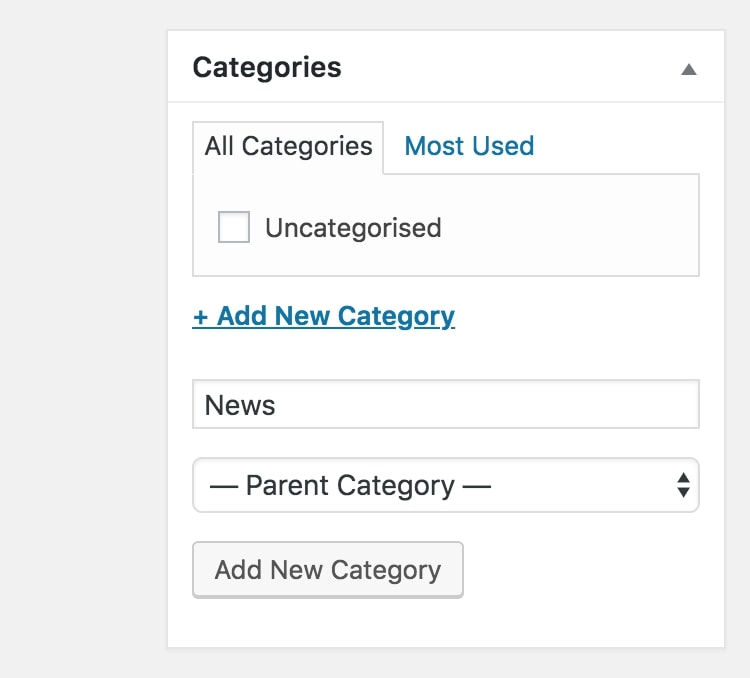
You can assign categories to a post from the content editor we introduced earlier.
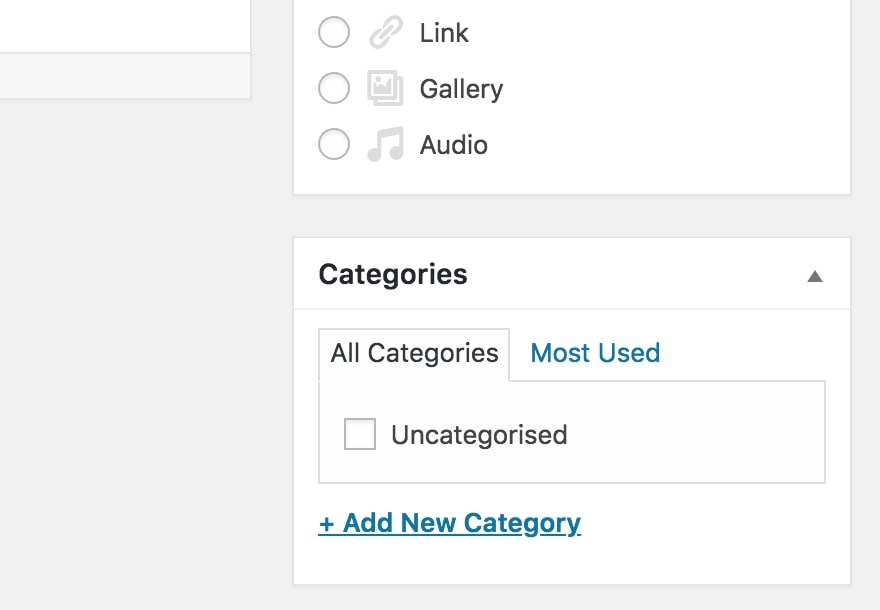
You’ll notice that you can also create new categories right here. Just click on Add New Category and enter a name. You can also select a Parent Category if you’re creating a sub-category.
To view and manage your categories, you can navigate to Posts > Categories.
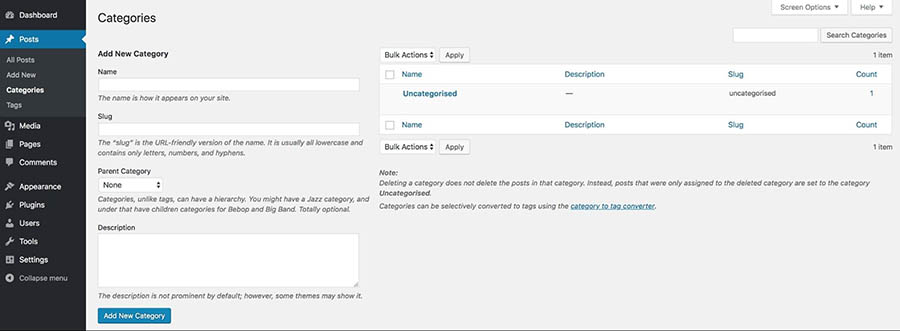
Here you can create new categories, as well as edit or delete existing ones.
7. Tags
Tags are very similar to categories. They are also designed to label content, but their usage is slightly different. While categories tend to be relatively broad and describe the type of content or the general subject matter of a post, tags are much more specific.
Tags can be used to indicate subjects and keywords that are relevant to a post. For example, let’s say you’ve written a post called How to Start a Dog Walking Business. You might assign this to a category like Business or Tutorial. Then you could then give it a number of descriptive tags, such as dogs, dog walking, starting a business, business tips, and animals.
As with categories, each tag also has its own page, which lets users easily find related content. However, tags are not hierarchical, which means that they do not have parents or sub-tags.
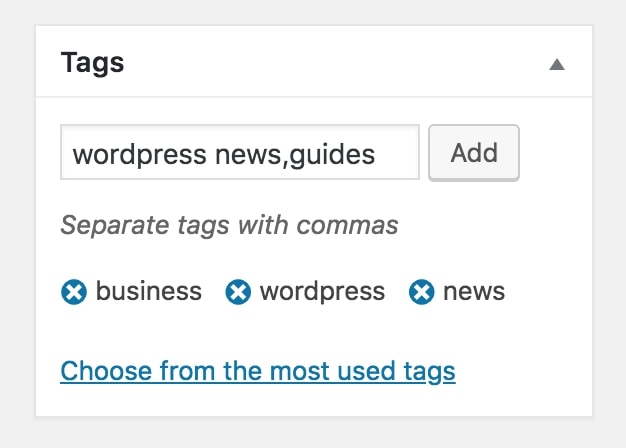
Tags are added to posts just like categories. In fact, the Tags section is located right underneath Categories in the editor interface.
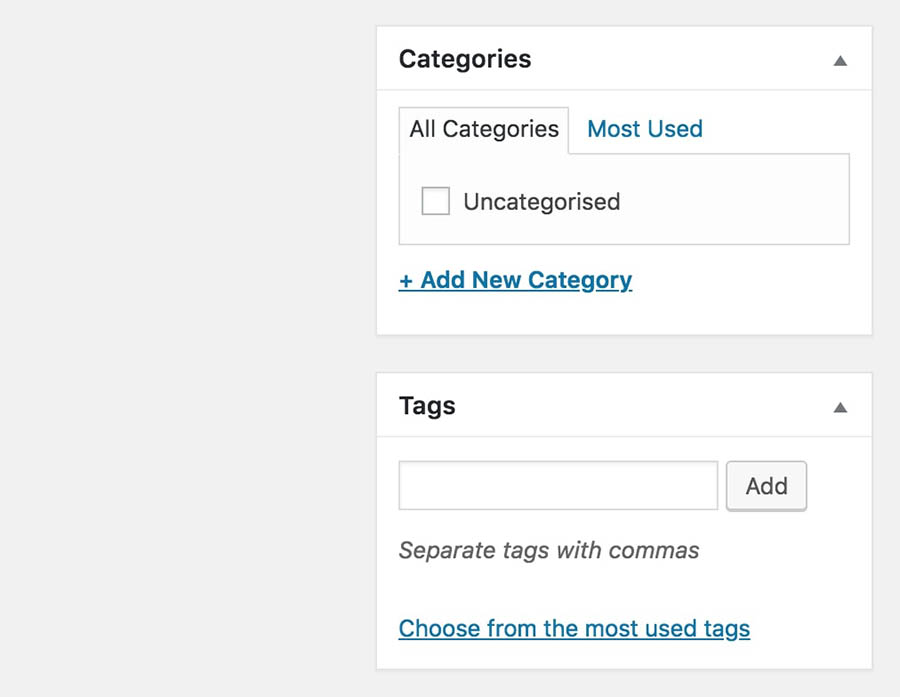
To add a tag, simply enter it into the text field. You can even add multiple tags at once, by separating each one with a comma.
You can then manage your tags by accessing Posts > Tags.
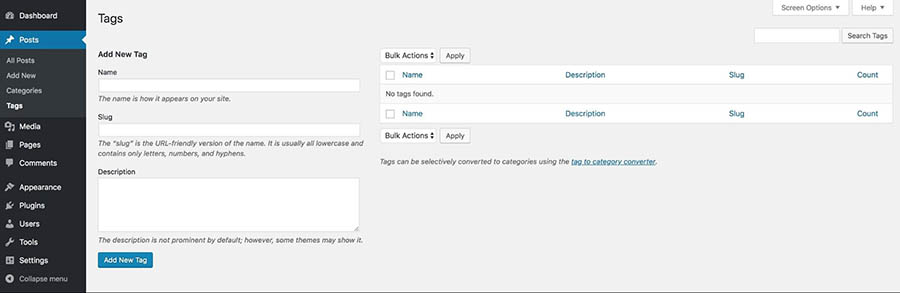
This screen works exactly like the Categories page, which we covered earlier. You can add new tags, edit existing ones, and even delete those you no longer need.
8. The Media Library
While text is an essential part of any site, you’ll probably want to supplement it with some additional media. Images are most common, but you may also want to upload video, audio, or documents.
This is where the Media Library comes in. This library is where all media files on your site are stored.
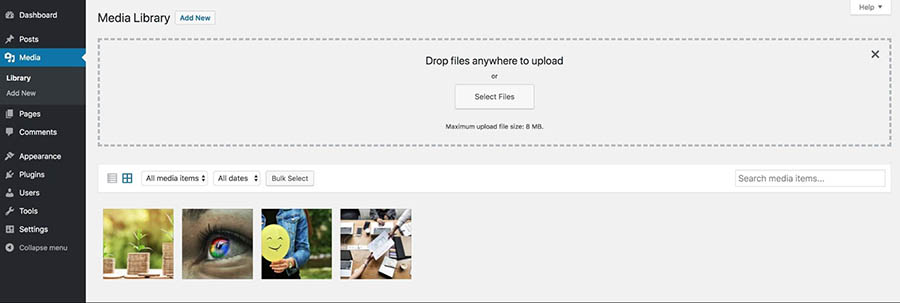
Uploading one or more files is as easy as dragging and dropping them from a local folder onto this page.
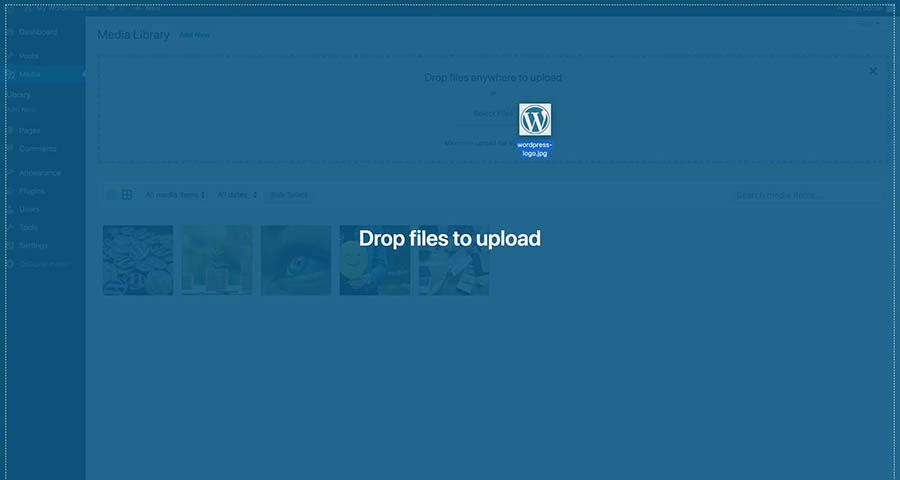
The files will be uploaded and added to the library. You can then include them in posts and pages, by clicking on the Add Media button in any content editor.
This opens the library in a pop-up window, where you can insert the files you want.
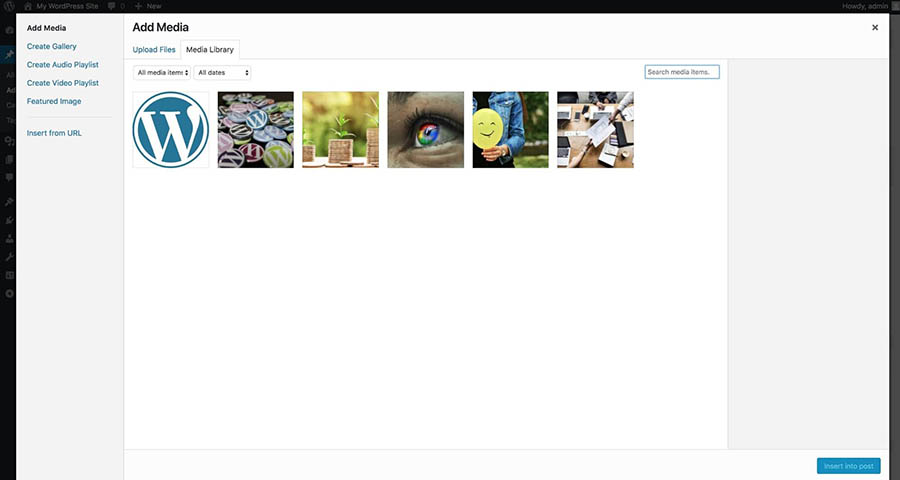
From here, you can also edit files and set various properties for them, such as ‘alt’ text.
9. Menus
Menus are the main form of navigation on your site. Instead of relying on a single menu, you can create several menus and insert them in different locations. For example, you could have one menu that appears in your site’s header, another in the sidebar, and a third in the footer.
To manage your menus, go to Appearance > Menus.
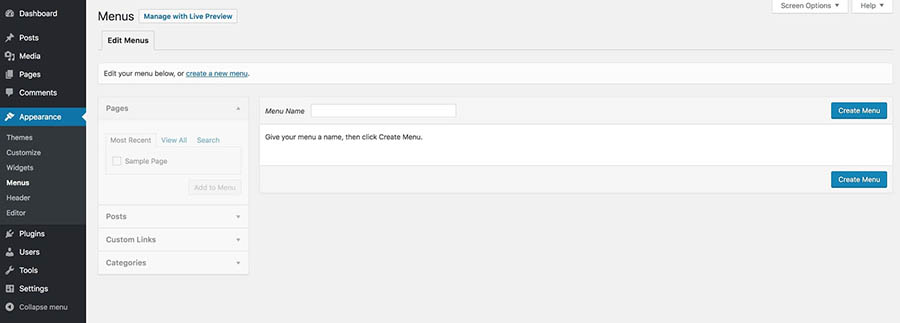
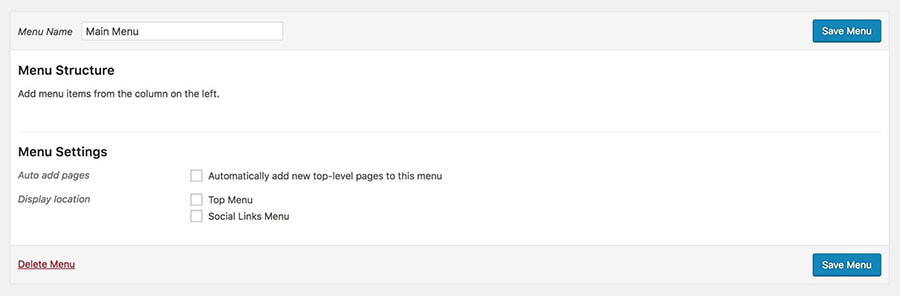
If you want to build a new menu, you only need to enter a name and then click on Create Menu. Once that’s done, you’ll get to choose which pages should be included in the menu, and where you want it to appear.
You can also add menus to your site in another way, by using something called a widget. Let’s look at what that is next.
10. Widgets
A widget is a type of content you can add to specific places on your site. These locations are known as ‘widget areas’ and are specified by your theme. The most commonly-used widget areas are the sidebar and the footer.
Widgets themselves add small useful features to your site, such as a search bar, a list of recent posts, or an RSS feed. WordPress includes a number of widgets by default, but you can add more via plugins.
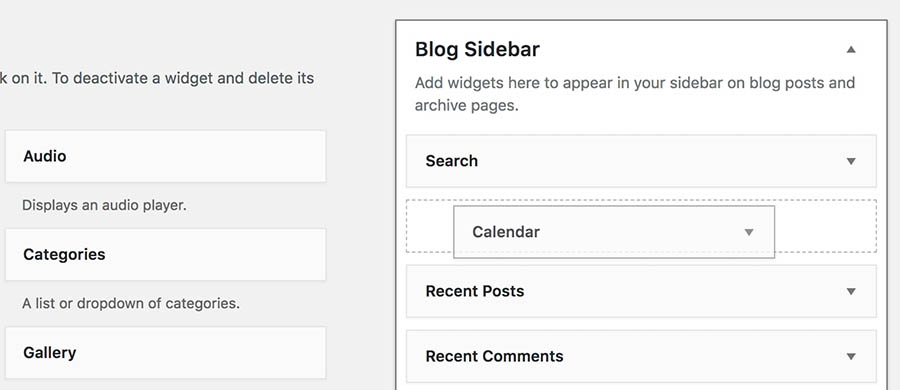
To place an existing widget on your site, start by going to Appearance > Widgets.
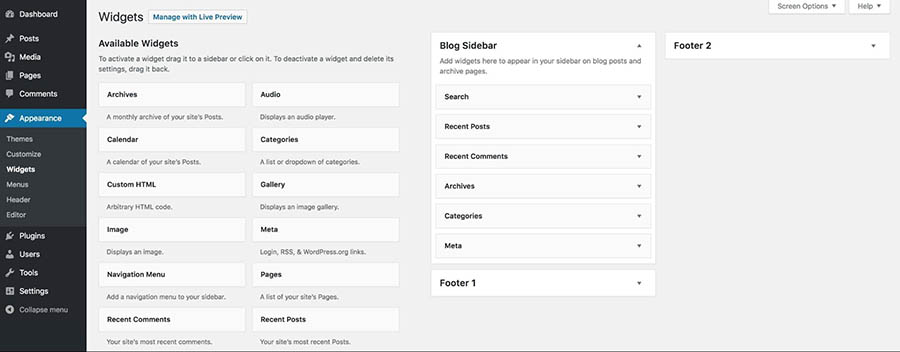
The available widgets are on the left, while the areas you can place them in are on the right. To add a widget, simply drag-and-drop it into one of those areas.
Once you’ve done that, you can configure the widget.
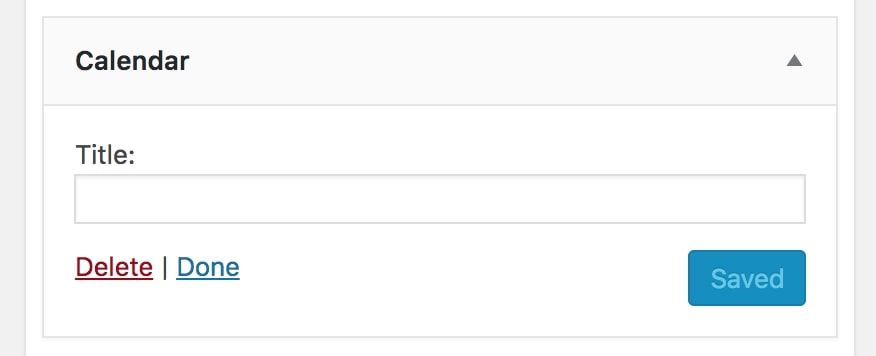
Widget areas are automatically saved when added or edited, so there’s no need to manually update your changes.
11. The Database
Every site needs a database to store its contents and data, and WordPress is no exception. In fact, your database holds all the content on your site, including posts, pages, users, comments, tags, categories, and much more.
While it’s perhaps the most vital part of your site, you can’t typically manage your database directly through the admin dashboard. Most users never have to worry about the database, in fact, unless you have a problem with it or you’re creating your own WordPress plugin.
12. Users
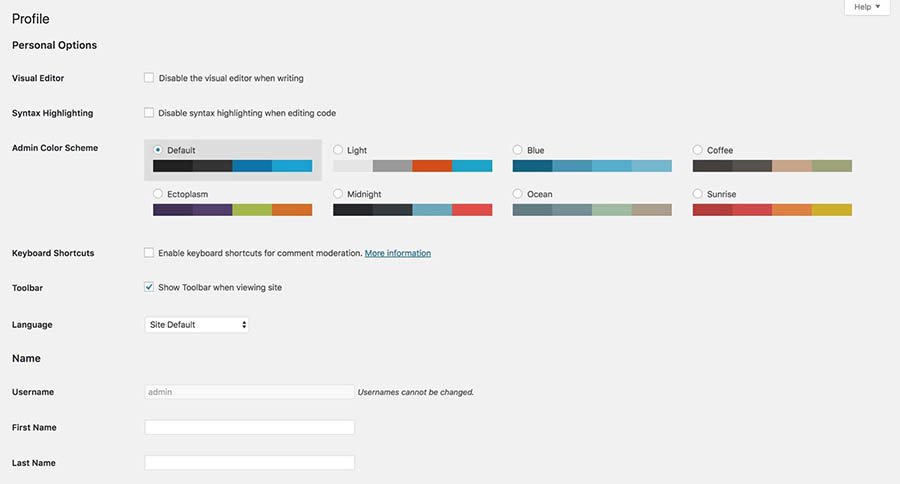
What would a site be without users? A user in WordPress is simply any person who can access your dashboard. Each user has their own profile with their personal information and credentials, and is also assigned a role.
The user role dictates what each person is permitted to do on your site. For example, an Administrator has full access to all features and actions, such as posting content, installing plugins, changing the site’s theme, and so on. However, a Subscriber will only be able to view and manage their own profile information.
You can manage this information from the Users > All Users page.
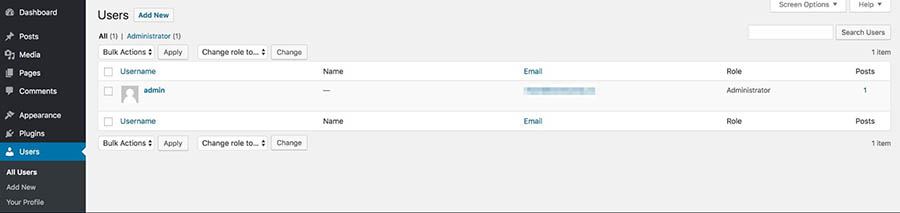
From here, you can create new users or edit existing ones.
For security, it’s critical that you assign people the correct user role, and avoid giving too many permissions to users who don’t require them.
13. Comments
Comments are a perfect way of letting visitors engage directly with your content. This feature is enabled on posts by default, although it is usually disabled on pages.
However, you might want to regulate your comments section. After all, some comments may come from automated spam bots, or be abusive in some way. To deal with this, you can manage visitor messages on the Comments screen.
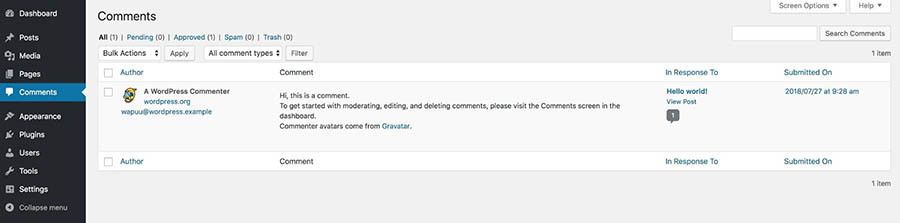
Here you can see each comment, approve or delete them, and create replies.

You can also mark comments as spam. This will help automatically filter out similar posts in the future.
To keep potentially harmful or abusive comments from appearing on your site, you can also choose to hold each comment for moderation when it’s posted. This way, you can go through and approve comments before they’re published.
14. Tools
The Tools section is a collection of miscellaneous features that are not commonly used, but may be required for some users. These tools mainly concern the importing and exporting of data.
For instance, you can import data from many different platforms, such as Blogger, LiveJournal, Tumblr, and RSS feeds.
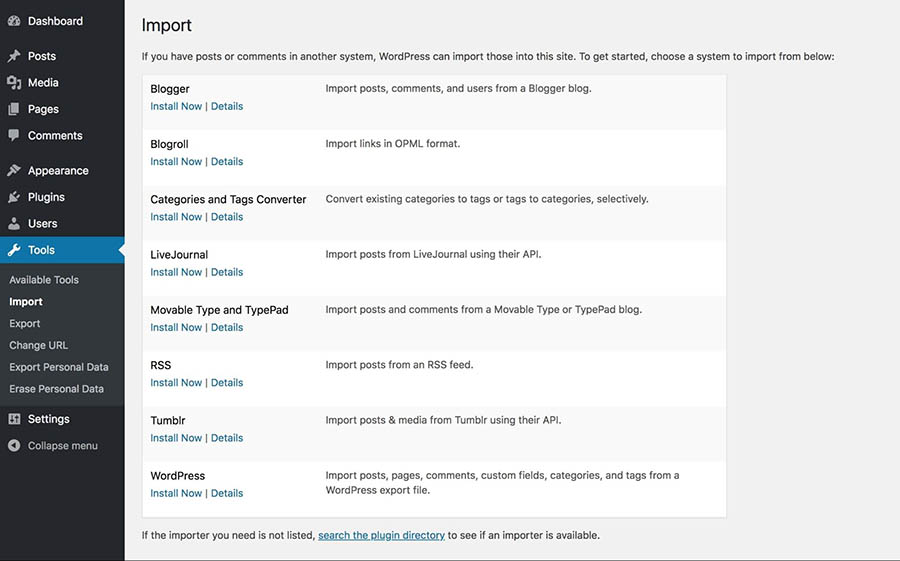
This is useful if you’re moving a blog from another platform into WordPress, and you don’t want to lose anything. You can also export data from WordPress, enabling you to import it into another site.
You may also need to export or erase the personal data of your users.
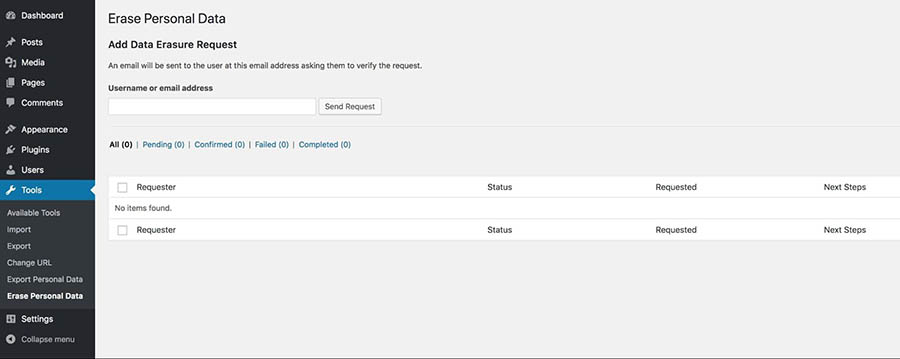
This is a relatively new feature, added to help WordPress sites be compliant with the General Data Protection Regulation (GDPR).
15. Settings
Finally, we come to the Settings page. As you can probably guess, this is where you can configure specific key options on your site.
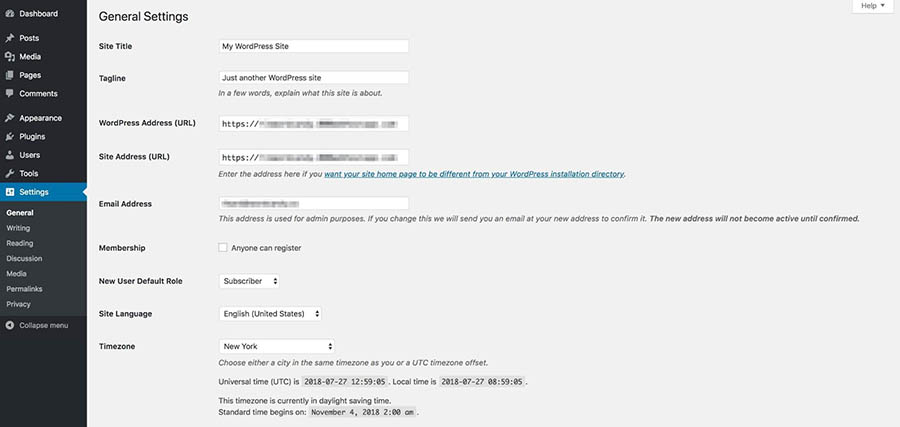
This section consists of several sub-pages, which each concern a different aspect of your site. For instance, the Writing settings enable you to set default configurations for your blog posts, while the Permalinks settings let you determine how your site’s URLs are structured.
There are a number of options you can tweak in these pages, and it’s essential you make the right choices for your site. As such, we recommend that you check out our comprehensive guide to WordPress’ settings.
Get Content Delivered Straight to Your Inbox
Subscribe to our blog and receive great content just like this delivered straight to your inbox.
Core Components
WordPress prides itself on being flexible and easy for practically anyone to use, regardless of their prior experience. However, to get the most out of the platform, you’ll need to understand how its core components work and how to use them.
In this article, we’ve taken you on a tour through the most important fundamentals of WordPress. This should give you a solid understanding of how the core of WordPress works. Naturally, you can expand on what we’ve discussed here by adding plugins, themes, and even your own code to your site.
Do you have any questions about the key components of the WordPress platform? Join the DreamHost Community today and let’s start the discussion!
4 Comments
Comments are closed.

Thank you for a great article Mark. WordPress is an awesome platform for so many reasons. Making the right choice comes with understanding what a platform is about and what is can accomplish for you. Your article is helping to point people in the right direction.
Thank you for sharing this great blog!! WordPress is very good platform for so many reasons. It is very useful to build good blogs and word press websites. All great tips are explained here, so this is very excellent post for all of us.
I would like to move my site which is currently hosted on Blogger to WordPress. Is there any guide for doing it without losing the traffic.
Good question. There is a good plugins that will solve that for you called Blogger to WordPress. You’ll find it here: https://wordpress.org/plugins/blogger-to-wordpress-redirection/. You definitely don’t want to lose any traffic!