Step-by-Step Guide: How to Start a Podcast With WordPress
Starting a new podcast presents a whole host of challenges. Not only do you have to battle any potential nerves that come with recording your voice for thousands of people to hear — but you’ll also have to set up a way to publish and share your new content.
Fortunately, you can easily launch your new podcast with WordPress, the world’s most popular Content Management System. Several plugins can help you display your new show right on your website. That way, you can start expanding your brand to a new audience and even tap into an additional source of income.
In this article, we’ll discuss what podcasts are and how you could benefit from starting one. Then we’ll provide you with a step-by-step guide on how to start a podcast with WordPress. Let’s jump in!
An Introduction to Podcasts
Podcasts are audio files that you can download or listen to on the internet. In some ways, they’re similar to radio shows, since they rely on the podcaster’s ability to engage the audience with sound, usually through speaking.
Podcasts are often presented in a series of episodes, and there are several different styles and types. Some focus on telling true or imagined stories, while others offer commentary on specific subjects. It’s also common to bring guests onto a podcast, for interviews or panels.
The Benefits of Starting Your Own Podcast
Whether you’re looking to expand your existing brand or launch a podcast as a first-time content creator, there are many benefits to starting one. For some people, a podcast is a chance to dig deeper into subjects that interest them and can become a fulfilling hobby.
Others find ways to turn their podcasts into a business through monetization. You can work with brands through advertising deals or even sell memberships and content. If you offer products or services, you could also use your podcast to promote sales.
As far as branding goes, a podcast is an effective method for engaging with consumers. With a podcast, it’s easy to sit down and speak casually to your target audience, so you can really show off your brand’s personality and encourage trust and loyalty from your listeners.
Of course, you’ll also have the chance to reach new audience members. While content such as blog posts or videos work for some people, others find audio preferable. People with long commutes, for example, may not have time to read a blog. However, they can listen to a podcast while they drive to and from work.
Related: How to Start a Blog (A Comprehensive Guide)
How to Start a Podcast With WordPress (In 9 Steps)
With WordPress, you can create a website that will both promote your podcast and enable your audience to find new episodes. Plus, WordPress integrates with the media hosting service Blubrry, which makes maintaining your podcast easy. In the following nine steps, we’ll show you how to get started!
Step 1: Create a Plan for Your Podcast’s Content
Without careful planning, you could end up in a sticky situation with your podcast. You don’t want to publish your first couple of episodes, only to realize that you’re out of ideas for content. Likewise, if you want to successfully monetize your podcast, having a strategy is key.
To begin with, it’s necessary to find a specific topic or niche your podcast will fit into. This can make it easier to grow your audience and keep them engaged by providing content they’ll find relevant and interesting. The bigger your audience is, the easier it will be to get advertising deals.
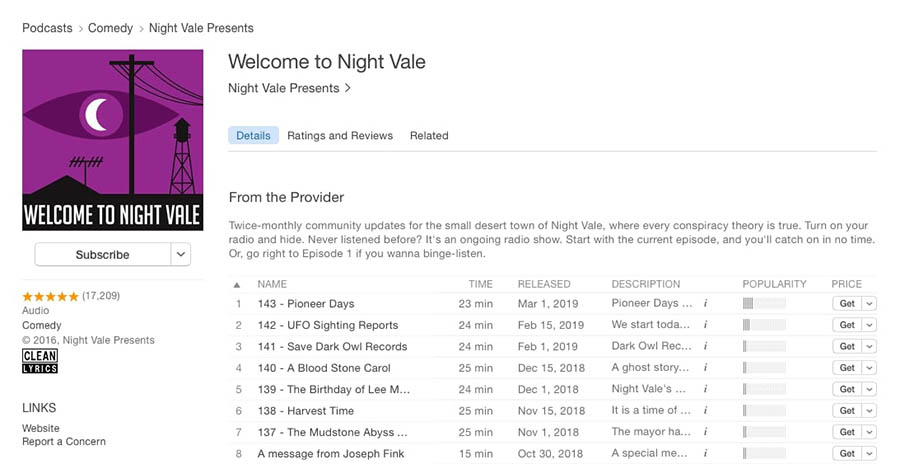
For example, the podcast Welcome to Night Vale shares eccentric fictional stories from an imagined town called Night Vale in the form of realistic radio broadcasts. This entertaining show attracts listeners who are interested in comedy and storytelling.
It’s also helpful for listeners if you have a regular posting schedule, so they know when to expect new content from you. By posting consistently, you’ll have a better chance of maintaining and growing your pool of listeners.
What’s more, it’s essential to take time to gather your resources. While it’s tempting to jump right into your first episode and worry about the rest later, that could cause problems later on. You don’t want to be in the middle of recording and realize you don’t have the sources or material you need for the episode.
Finally, it’s especially vital to plan ahead when you’re working with others. For example, before you can do an interview, you’ll need to ask the interviewee’s permission and coordinate schedules. You may want to outline your first five episodes before going any further and make note of what you’ll need to have prepared before each recording.
Step 2: Set Up Your Podcast Website
While you could technically set up a podcast without a website, it’s not recommended. A site makes it easier to promote your podcast, share information about it, and build a community of listeners. You can also direct your audience to other relevant locations for your brand, such as your blog or specific product pages.
To set up a new website, you’ll need a domain name and a hosting provider. You can quickly register your domain name with us at DreamHost. Just check the name you want in our Domains Search Tool to ensure that it’s not taken, then purchase and register it.
As for web hosting, a managed option such as our DreamPress plan is ideal for self-hosted WordPress sites. With a managed WordPress plan, your hosting provider will take care of maintenance tasks such as backups and updates for you, so you can focus on creating your podcast and communicating with your audience.
A managed WordPress hosting plan should also make it easy to install WordPress. At DreamHost, WordPress comes pre-installed on our DreamPress plans — right out of the box. If you opt for a different plan, you can easily add WordPress through our one-click installer. Just log in to your DreamHost account, navigate to WordPress in the sidebar, and select One-Click Installs.
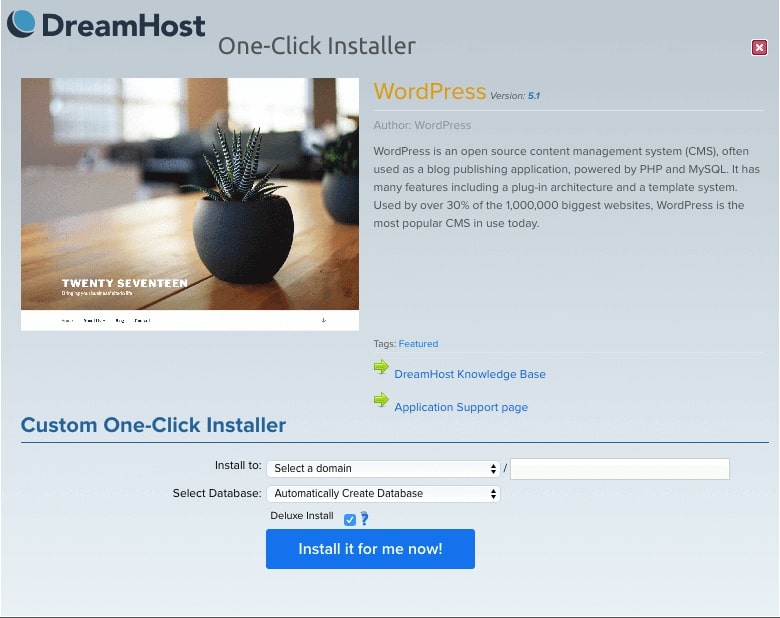
On the resulting page, select the WordPress icon from the list, and the installation options will open in a pop-up window. Click Install it for me now!, and you’ll soon have your WordPress site up and running.
Then, all that’s left to do is customize your site with a theme, plugins, and any other features or content you want to add. Once your site is ready to go, you can start getting it prepared for your podcast.
Wondering How to Host a Podcast on WordPress
Partner with DreamHost! Our hassel-free, high-performance WordPress hosting can help you grow your audience. Plans start at $2.59/mo.

Step 3: Host Your Podcast With a Media Hosting Service
While your website is critical to the success of your podcast, it won’t do a very good job of hosting your audio files. This means you’ll want to look into a podcast hosting service that can store your files for you. As we mentioned before, Blubrry is an excellent option.
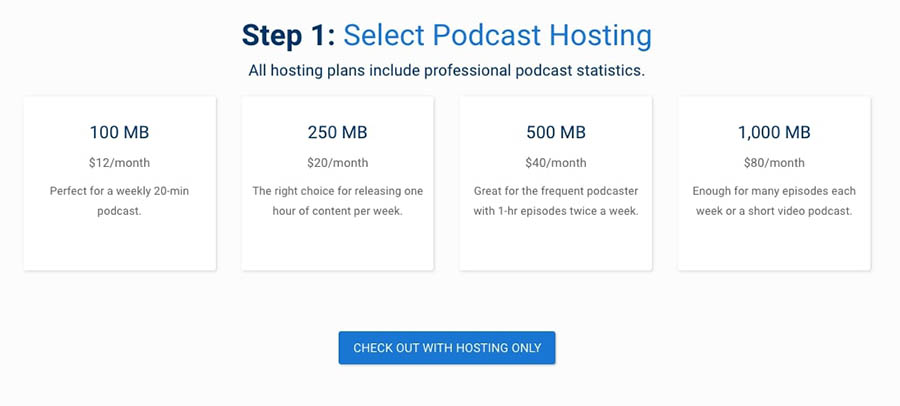
Its plans start at $12 per month for 100MB of storage. You’ll receive an additional 100MB every month (for example, you’ll get a total of 200MB during your second month with Blubrry, 300MB during your third month, and so on). This is enough storage for a weekly podcast of about 20 minutes per episode.
Additionally, you’ll be able to add a media player to your website so your audience can listen to episodes directly from your site. The player is “white-labeled,” so you don’t have to worry about third-party branding on your site, and you can customize the player to blend with your site’s design.
Related: How to Start a WordPress Blog: A Comprehensive Guide
Step 4: Acquire Your Podcasting Equipment
With everything ready to store your podcast’s files, it’s time to actually create your content. First, you’ll need the right tools to do this. Creating a podcast involves both recording and editing audio, so you’ll want equipment that can handle both of these tasks.
Using the right equipment ensures high-quality audio for your show, which in turn impacts how listeners perceive your podcast. If there’s too much background noise or it’s hard to understand what you’re saying, you’ll have a difficult time maintaining a following.
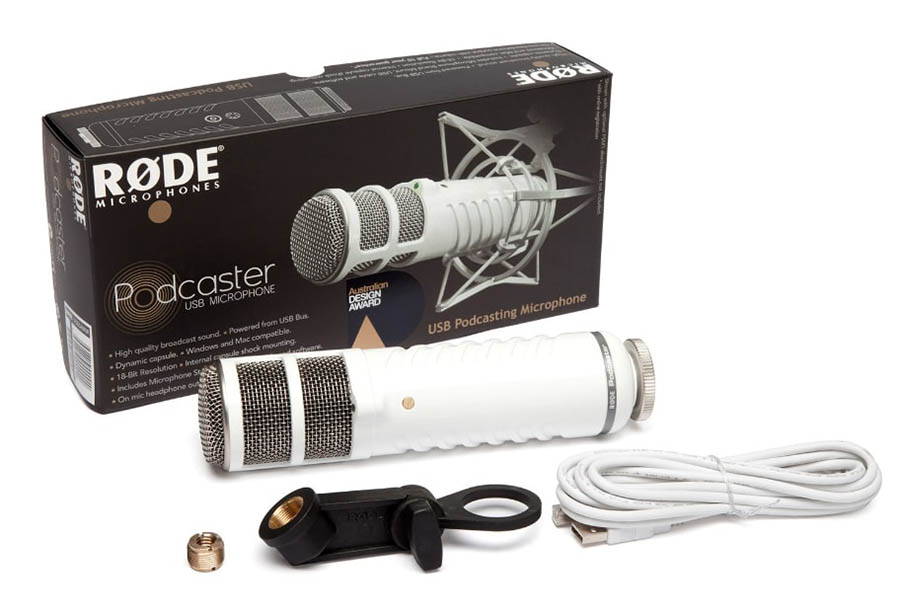
To get the ball rolling, you’ll want a microphone that can capture your audio. If you’re brand-new to podcasting and want something easy to use, the SamsonQ2U is worth considering. You could also look into the Rode Podcaster, a mic designed specifically for podcasting.
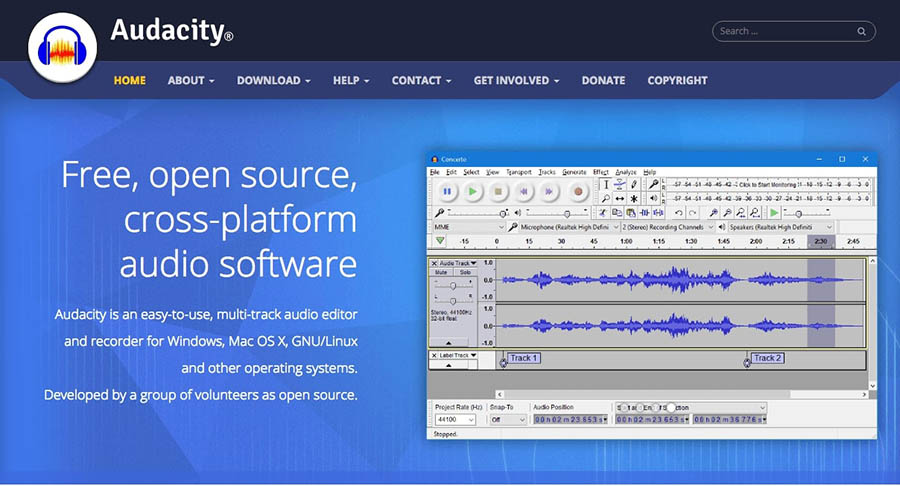
You’ll also need editing software. Podcast episodes can be fairly long, and you’re not expected to record each one in a single take. Having the ability to edit your audio will prove helpful since you can cut out any unexpected sounds (such as sneezes or coughs), take breaks, or fix mistakes.
Garageband is free for Mac users and gets the job done with basic editing features. It’s a great tool for beginners because it’s easy to use and doesn’t require a financial investment.

If you don’t use a Mac, or you want something with more advanced features, you can try Audacity. The downside is that it has a fairly steep learning curve and can be tricky to use when you’re first starting out.
If you’re willing to pay for your editing software, Adobe Audition is another option used by many podcasters.
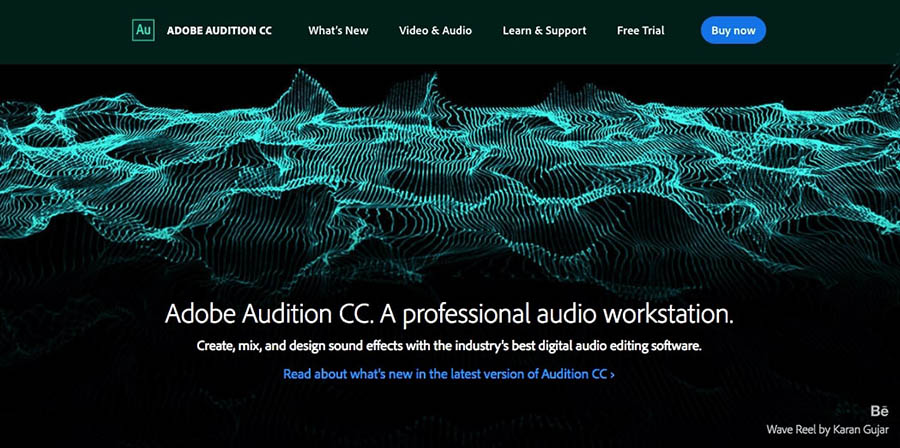
It’s capable of producing professional-quality audio. However, at almost $21 per month, you might want to consider using a free platform until your podcast starts making money.
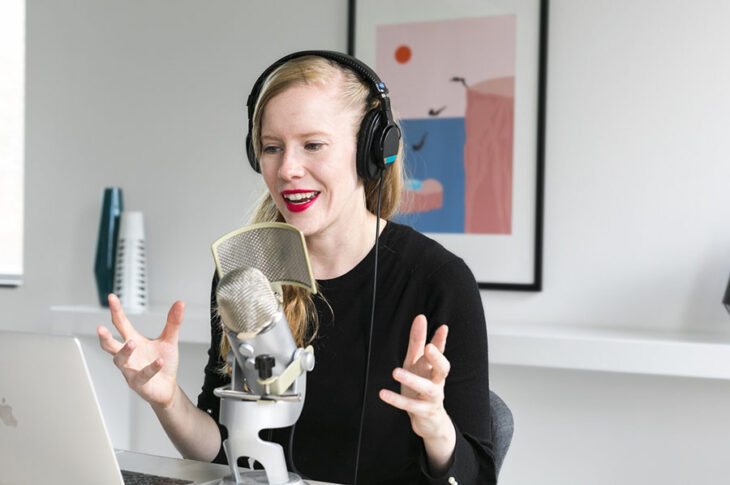
Step 5: Prep, Record, and Edit Your First Podcast
You’re probably itching to record your first episode by now. Before you do so, however, you’ll want to consider putting in some prep work. Creating an outline or even a full script for your podcast episodes can help you save time, by ensuring that you have enough content for the entire episode.
If you’re going to be doing an interview or a panel on your podcast, preparing questions for your guests keeps you focused and is courteous to the people you’re working with. You don’t want to waste others’ time because you don’t know what to talk about at your own interview, after all.
Once your preparations are complete, you can finally sit down to record. To ensure good sound quality, record in a small room and maintain a consistent distance from your microphone. It’s also a good idea to wear headphones, such as the ATH-M50x by Audio Technica, to prevent audio feedback.

During the editing phase, you can also add interest to your podcast with background or intro music. For example, you can upload music clips to your editing software and combine them with your recording. Just make sure to avoid copyright infringement by using royalty-free clips.
Step 6: Publish Your Podcast With WordPress
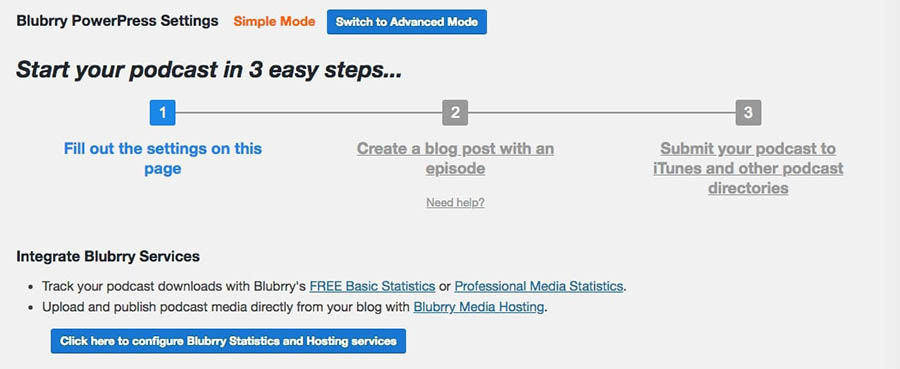
The Blubrry PowerPress plugin makes publishing your podcast on your website simple. By installing and activating PowerPress, you’ll also be able to upload your podcast to Blubrry’s hosting platform via your WordPress site.

Once you’ve activated the podcast plugin, simply configure its settings by filling in the required fields. You can also link the plugin to your Blubrry Media Hosting Account, which will streamline the rest of the process.
To publish your first podcast episode, navigate to Posts in the WordPress dashboard and select Add New. Enter your episode’s title and any notes on the episode into the editor and then scroll down to the section labeled Podcast Episode.
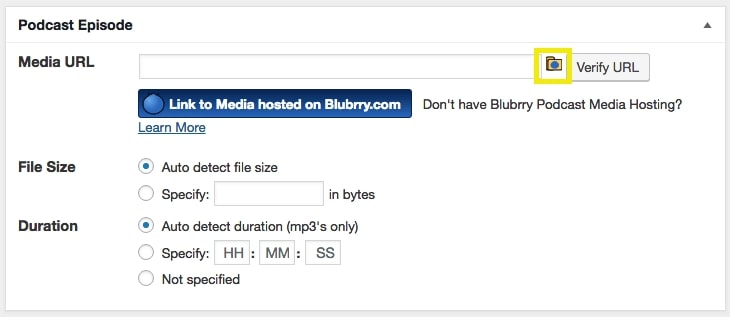
Here, you can drag and drop to upload your podcast to your site. Simply click on the folder icon next to the Media URL field, and select the podcast file from your computer. Once the file has finished uploading, scroll back up and click on Publish to add the episode to your site.
You’ll still need to add the file to your Blubrry hosting account, which you can easily do within WordPress by navigating to PowerPress > Migrate Media. Click Select Media to Migrate, and choose the correct audio file from the list. Then click on the Request Migration button.
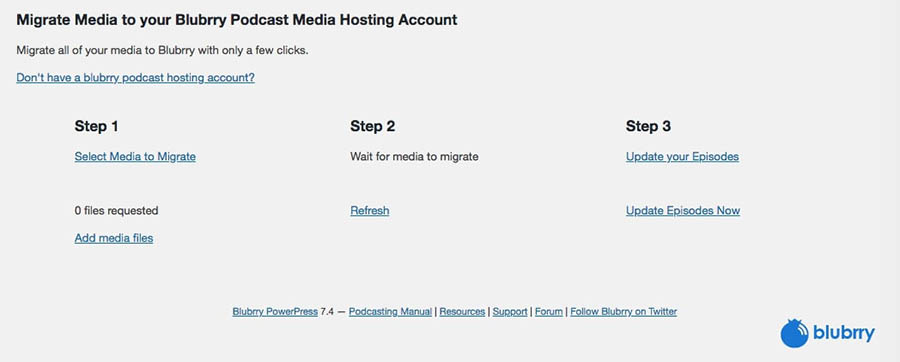
Depending on the size of your file, it could take some time for your episode to migrate. Therefore, you’ll want to check back in on the migration page every so often. Once “Step 2” is shown as complete, click on Update Your Episodes to finish the process.
Related: The WordPress Blogger Checklist: 10 Things to Do Before Hitting Publish
Step 7: Submit Your Episodes to Podcast Directories
While featuring your podcast on your WordPress website is important, it’s also beneficial to tap into the pre-existing audiences on a podcast player, such as iTunes or Stitcher. These directories are where many listeners look for new popular podcasts and can help you expand your audience and gain more subscribers.
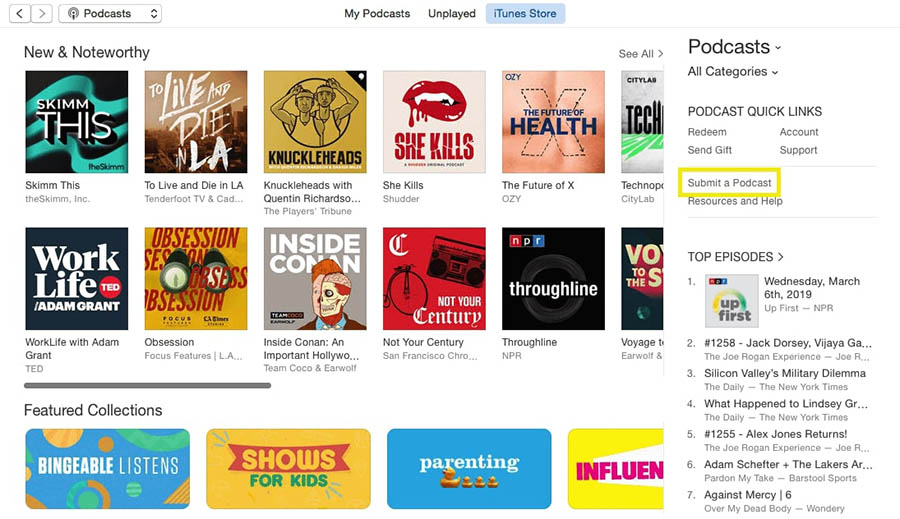
To submit a podcast to iTunes, you’ll need an Apple ID. Log in or create one, then navigate to the Podcasts section and click on the Submit a Podcast link.
You’ll be asked to supply an RSS feed, which you can find via PowerPress. In the plugin’s settings, navigate to the Destinations tab, and select the Submit to iTunes link. You’ll be directed to a page on Blubrry’s site, which will display your RSS feed’s URL. Copy and paste that into iTunes.
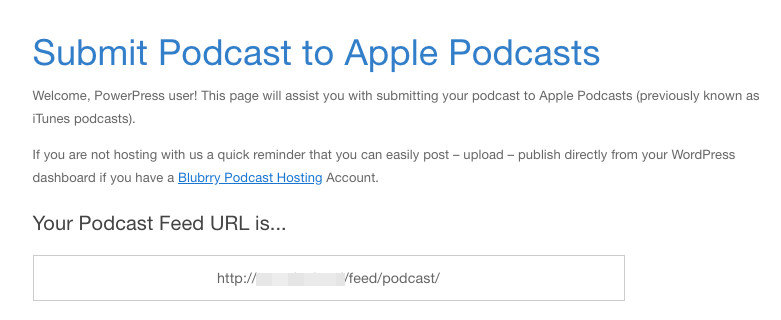
After that, you can review your podcast information and then click on Submit. It can take up to ten days for your podcast to be approved, although most are up in the Apple Podcasts directory within three days.
If you want to submit your podcast to Stitcher, you’ll need to sign up to be a partner. Once you’ve submitted your contact information, Stitcher will contact you and help you create a partner account, which you can use to submit episodes.
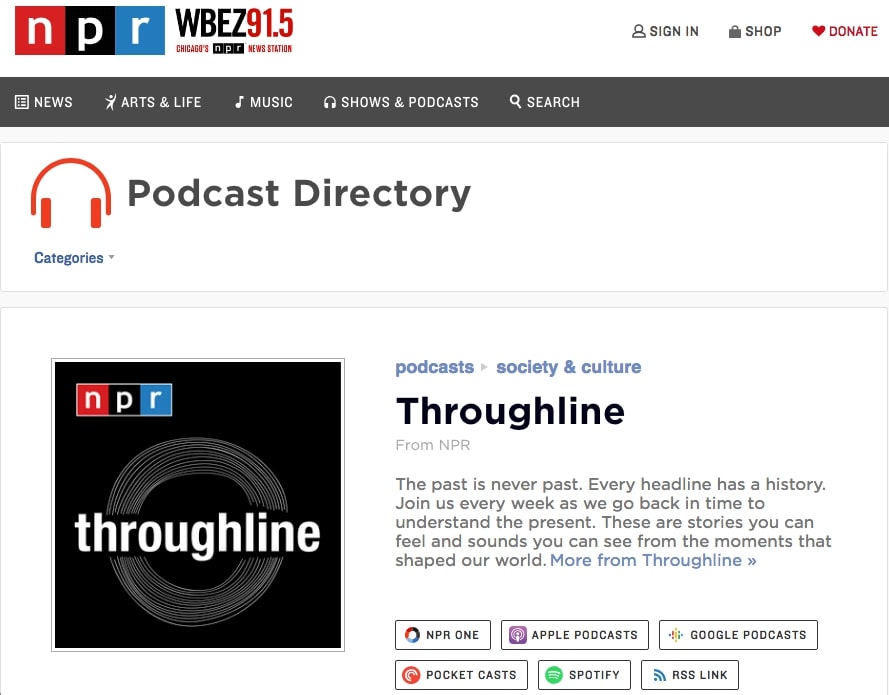
Apart from those platforms, you might also want to submit your podcast to SoundCloud, Spotify, or Google Podcasts. The more platforms you use, the wider reach you’ll have. However, it’s worth keeping in mind that this will also require more maintenance since you’ll have to update each platform with new episodes and other updates.
Step 8: Promote Your Podcast to Gain Followers
Now that your podcast is up and running, you’re ready to start promoting it to gain subscribers and grow your audience. While you’ll hopefully gain some followers organically through podcast directories, it’s difficult for a show to take off without a marketing strategy.
Posting about your podcast on social media can make it easier to spark some interest. You might also try running a giveaway or special promotions for listeners, to encourage them to tune in regularly. Having guests on your show is especially helpful, as it lets you tap into pre-existing audiences.
Finally, consider providing your podcast content in other formats.
Some podcasters film videos while recording their podcasts, and post those videos on their websites, YouTube, or other social media platforms. Transcripts can easily be turned into a blog post, which makes your podcast’s content more accessible.
Step 9: Monetize Your Podcast
Once your podcast is off the ground and has started to gain traction, you can start thinking about monetizing it. There are several options when it comes to generating revenue from your podcast, and you can implement any or all of them to turn your show into a business.
Ads are a very popular way of monetizing podcasts. You can reach out to sponsors and negotiate deals on your own or you can become part of an advertising network such as Blubrry’s.

If your audience seems to be invested in your podcast, you can consider creating bonus content and charging for access to it. If people really enjoy your show, they may be willing to pay for more of it. You can also charge membership fees through platforms such as Patreon.
Additionally, if your podcast is part of a larger brand, it can give you space to promote other content, products, and services. Just remember that the podcast itself shouldn’t become an ad, and should provide valuable entertainment and/or information (rather than solely promoting your business).
Get Content Delivered Straight to Your Inbox
Subscribe to our blog and receive great content just like this delivered straight to your inbox.
Ready to Go On Air?
Starting a new podcast can be both exciting and stressful. Fortunately, using WordPress to publish your podcast can help smooth out the process of launching your new show. With the help of a few plugins and the right equipment, you’ll be ready to take your brand to new heights.
Do you have any questions about starting a new podcast with WordPress? Connect with us on Twitter and let us know your thoughts!