What Is FTP/SFTP? A Guide for WordPress Users

WordPress is pretty user-friendly to those without much technical experience, especially with help from the right plugins. That said, there are some tasks that plugins can’t always help with, such as troubleshooting errors or implementing advanced customizations.
In these situations, it can be helpful to understand File Transfer Protocol (FTP) and Secure File Transfer Protocol (SFTP). These will enable you to access and interact with your site’s files directly in order to make changes and additions.
In this article, we’ll explain the basics of FTP and SFTP and discuss why they can be useful. Then we’ll teach you how to execute three common uses of these technologies, using the WebFTP feature for DreamHost customers. Let’s get started!
Understanding FTP and SFTP (And When to Use Them)
FTP is a way to communicate directly with a remote server, such as the one hosting your WordPress site. It’s generally used to manage the files stored on that server. This is important because some file management tasks can’t be carried out on the WordPress back end.
The downside to using FTP is that it doesn’t necessarily take internet security risks into account. SFTP, the more advanced version of the same technology, enables you to manage files on your server just like FTP does. However, it uses a previously-established Secure Shell (SSH) connection to maintain the safety of your files and the site as a whole.
There are several tasks for which FTP and SFTP are useful, including bulk file uploads, manually installing plugins and themes, editing files, resolving compatibility issues, and changing file permissions. Without direct access to your site’s files, these functions become much more difficult, or in some cases, impossible.
An Introduction to WebFTP
To connect to your site’s server and manage your files, you’ll need an FTP client. Typically, the term ‘FTP client’ is used whether you’re accessing the site via FTP or SFTP. There are a variety of third-party FTP clients available for download, but if you’re lucky, your web host will provide one for you.
For DreamHost customers, we have a dedicated FTP client: WebFTP. It enables you to quickly connect to your server, without the hassle of logging in to a third-party client. Then, you can efficiently manage your files using a simple navigation scheme.
WebFTP is available to any DreamHost customer with a fully-hosted site, including those using DreamPress, our managed WordPress hosting service. If that includes you, then you’ll be able to start using it right away!
Get More with DreamPress
DreamPress Plus and Pro users get access to Jetpack Professional (and 200+ premium themes) at no added cost!

3 Key Tasks You Can Complete Using WebFTP
It’s important to note that any time you use FTP or SFTP, there is some risk involved. Mistakes can easily be made, and some changes could irreversibly damage your site. Before you start managing your files with FTP or SFTP, therefore, you’ll want to back up your site just in case. That way, you can restore it if something goes wrong.
If you’re a DreamPress user, then you can rest easy! We back up your website automatically for you each day. Plus, DreamPress customers can now create backups on demand via their control panel.
As long as you take the right precautions, FTP and SFTP can improve your site by enabling you to manage files in ways not available within the WordPress back end. Without further ado, let’s look at some of the key tasks you can complete by using WebFTP to access your site’s server.
1. Upload Files to Your Site
One use of FTP/SFTP is to manually install WordPress on your host’s server. You can do this by downloading WordPress, initiating a connection with WebFTP, and then uploading the WordPress files to your server. By using a similar process, you can also install plugins and themes manually.
Note: If you’re a DreamHost customer, you’ll have a one-click install option for WordPress. This means you can get your site up and running in just a few minutes — no FTP/SFTP required. We recommend the one-click installation to our customers; it makes setting up a site easier and allows us to automatically update your WordPress software as new versions roll out.
Since WordPress has a maximum upload file size, it can be difficult to add very large files to your site through the admin interface. It also prevents you from bulk uploading a large number of files at once, which can mean you have to upload them one at a time instead. If you want to upload large files or save time by adding several files at once, you’ll need to use FTP/SFTP.
To upload files to your site, start by logging into your DreamHost account. Then, from the Domains drop-down menu in the sidebar, select Manage Domains.
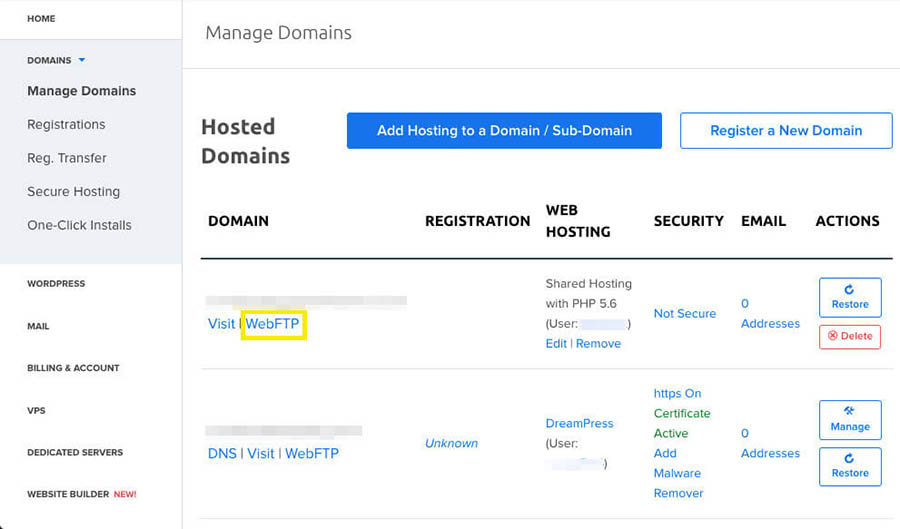
Under each domain you have that’s fully hosted with DreamHost, you’ll see a WebFTP option, which you can click on to launch our FTP client.
Next, simply select the upload icon in the bottom toolbar. A window will pop up and enable you to choose files to upload.
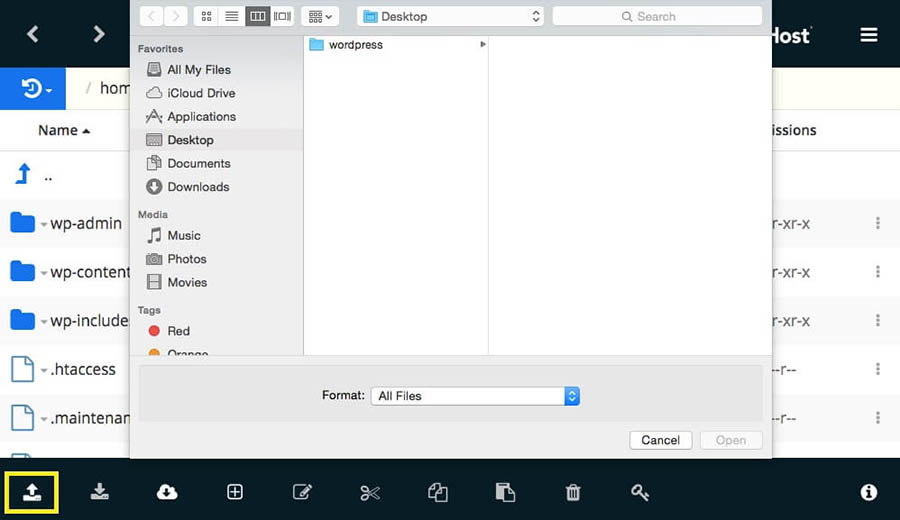
If you’re installing WordPress, this is where you would select the WordPress files you downloaded. If you’re installing a premium plugin or theme, you can upload its folder to the plugin or theme directory within the wp-content folder.
As for media files, you can start by adding them to the uploads directory in wp-content. Then, you’ll need to register them with a plugin such as Add from Server in order to access them in your Media Library.
Related: Tutorial: How to Install a WordPress Theme
2. Edit WordPress Files
Sometimes the best way to customize certain theme elements and advanced settings is by editing files directly on your server. It’s important to note that, with few exceptions, it’s not recommended to modify WordPress’ core files.
One exception is the wp-config file, which stores information about your site’s database. You can edit this file to disable automatic updates, change your database’s prefix, and carry out other advanced tasks.
To edit a file on your site, select it from the list in WebFTP, and click on Edit to open the editor interface.
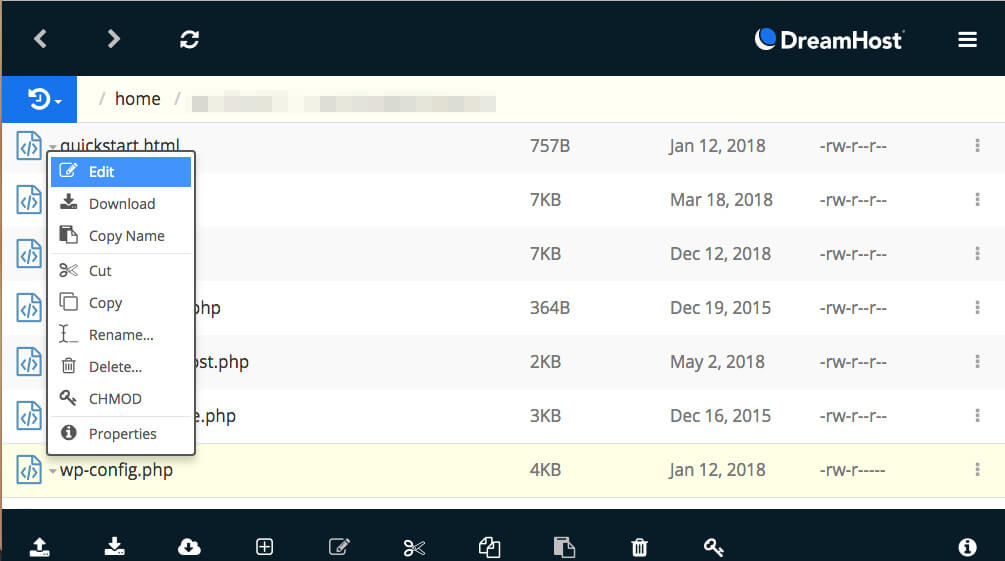
Here, you’ll be able to make any necessary adjustments to the file. If you want to make changes to your theme, you’ll want to edit the style.css file, which is located in your theme’s directory in the wp-content folder.

A common practice is to make note of everything you change in your files as you perform each edit. This way, if errors occur after you’ve finished editing, you can quickly look for mistakes in the changes you made.
When you’re finished editing, click on Save to implement your changes. Then, you can check out your site on the front end to make sure they’ve been successful.
3. Change File Permissions
File permissions determine who can access and edit specific files and folders on your website. If there is more than one person with access to your site’s back end, you may want to limit permissions for individual users, to make sure sensitive material isn’t tampered with.
Changing file permissions can also be used to solve certain WordPress errors, including the “403 Forbidden – Access Denied” error. This problem can be caused by corrupt files or poorly-configured security plugins, and denies you access to specific pages (sometimes even including your wp-admin page).
To change file permissions with WebFTP, select the file you want to affect and click on CHMOD, or use the key icon in the bottom toolbar.

In the resulting pop-up window, you can change the file permissions for different types of users by selecting and deselecting the boxes.

In general, the best strategy is to give each user only the minimum permissions they need to do their job. As the owner, of course, you’ll want to retain the maximum permissions for yourself. When you’re finished making changes here, click on OK to save your permission settings.
File This Away
FTP and SFTP may seem intimidating on the surface, but once you start using them, you’ll find them to be handy tools for getting your WordPress site in top shape. Our new WebFTP feature for DreamHost customers makes the process even smoother with easy navigation for accomplishing all the most common file-related tasks.
Do you have any questions about FTP, SFTP, or WebFTP? Join the DreamHost Community and let’s discuss!
